

Bind, a map in Valorant, may be quite old, but it was developed with creativity even at its release. It features a unique aspect—two teleporters—that opens up numerous strategic possibilities for teams. Smoke screens are a critical strategic element on all maps, so knowing the best positions is extremely important, not just for players who play as controller agents.
The best controller on Bind
Opinions on the best smoker for Bind vary. Some prefer Brimstone, while others opt for the significantly different Omen. Both agents perform well on this map, so the choice depends on personal preferences. If you like a more active and aggressive playstyle, then Omen is your choice. However, if you prefer a calm, strategic, and thoughtful style, then the "old dog" Brimstone is your ideal choice.
It’s important to note that Brimstone and Omen are often chosen as secondary controllers, as Viper is the primary controller on this map. This is especially true in the professional scene, where her pick rate on Bind was up to 100 percent until the latest patch 8.07, which significantly nerfed her.
Point A
Attack
Exit Short

Below, you can see an image depicting very effective smokes for exiting to point A via Short. Both smoke screens block the enemy’s view, allowing for a safe Spike plant without the risk of being spotted. Additional protection can be provided by Sage's wall, which can be safely placed thanks to these clouds, protecting the agent planting the Spike.
Split Short + Shower
If your team plans to attack point A from Short and Shower, the previous smoke setup will be less effective, as players from Shower won't be able to assist those from Short through the smokes. Therefore, the setup shown below is better in this situation, as the smoke clouds separate the front from the back, ensuring smooth coordination between players from both positions.
Deep Control of A

There are instances when the enemy team completely gives up position A, and your lurker has relayed this information. In such cases, the previous smoke options will be ineffective, as you can occupy more space, including the back of the plant. Smoking the exit from the defenders' spawn and Haven will give you a significant advantage and complicate the enemy team’s attempt to retake point A.
Defence
The situation on defence differs from the attack, as there are no predefined positions for constant smoke usage. An effective defence requires more improvisation and reaction to the situation. However, below we show several options that can help take control of certain areas on point A.
Shower


Using two types of Oneway smokes, shown below, you can easily take full or partial control of the Shower position. This is crucial as controlling Shower limits the enemy's options for exiting to point A.
Short

A smoke on A Short will block the attackers' view and hinder their ability to execute their pre-planned strategy.

Point B
Attack
Close Control of B

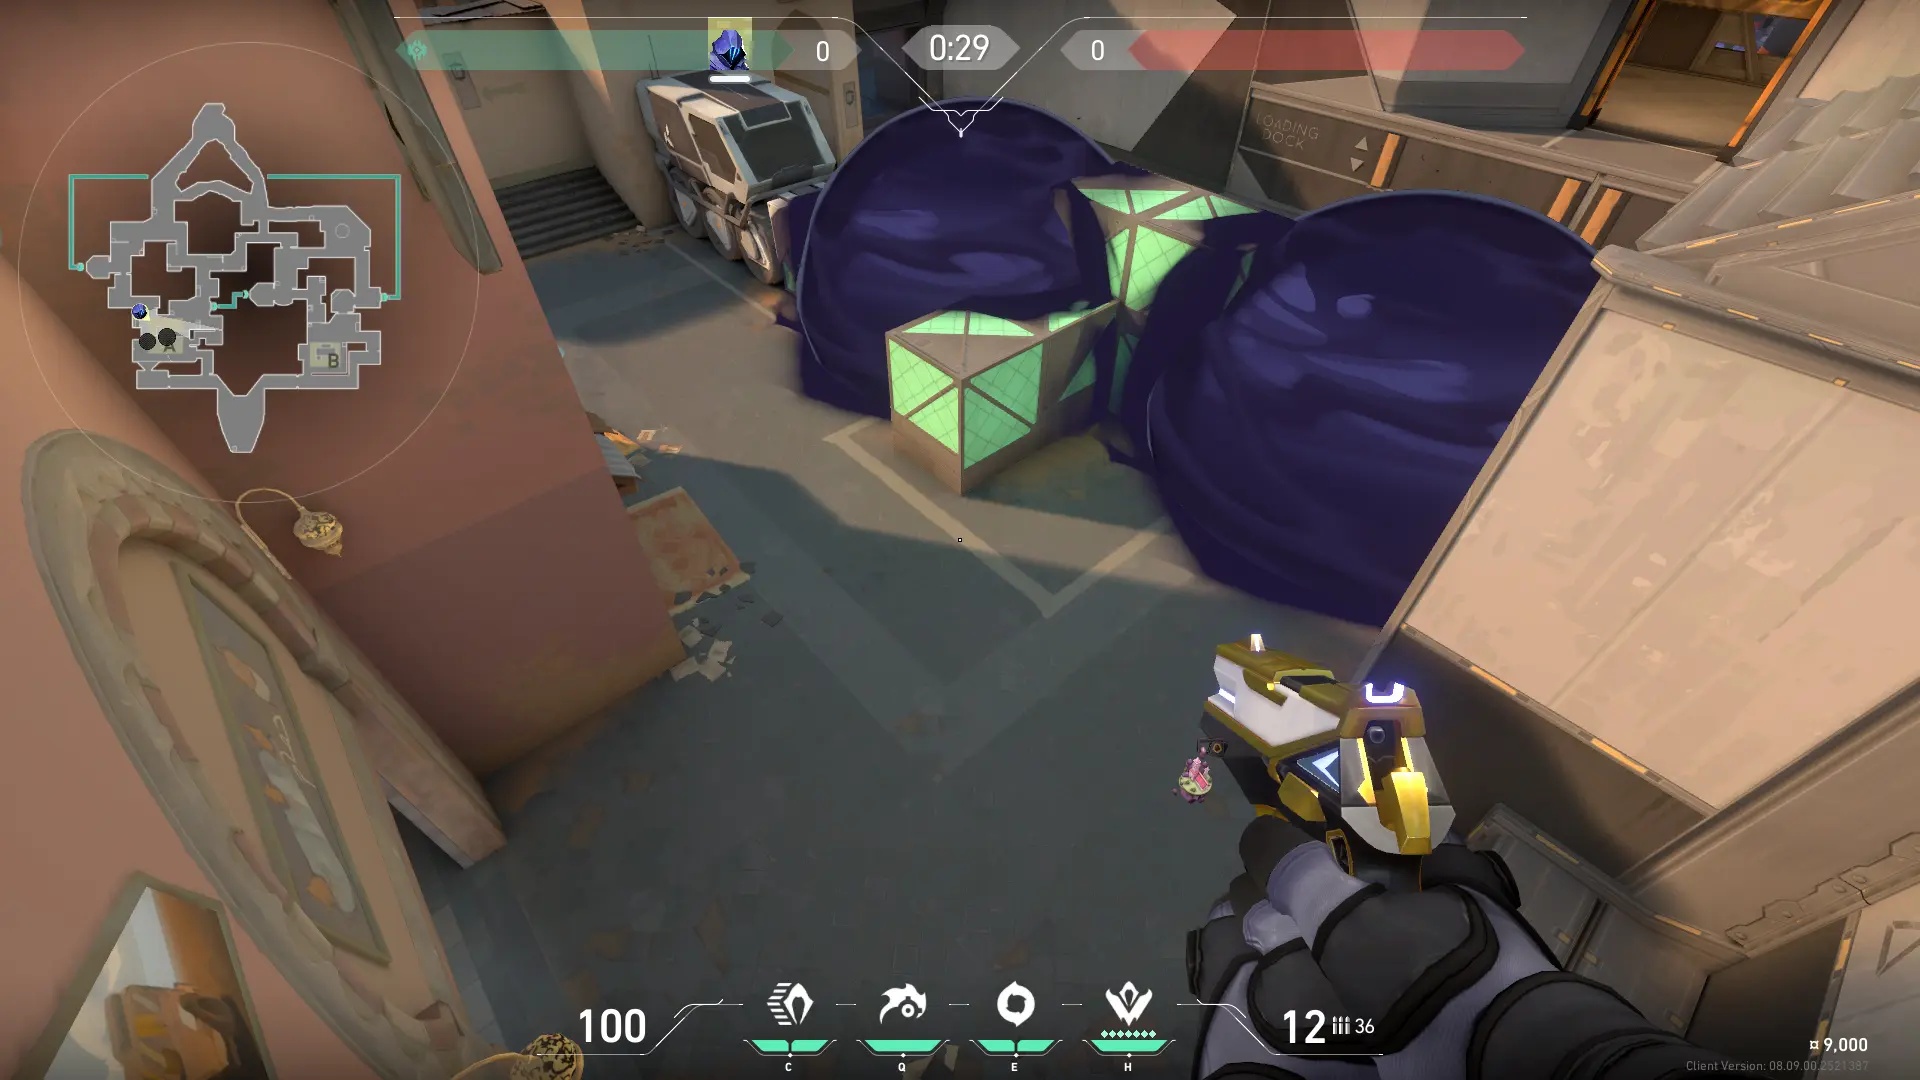
To capture the near side of point B from the attack, you need to cut off players behind it by using smokes to block their view from the right and left sides. This allows for eliminating enemies in close positions and controlling the smoke clouds to prevent opponents from emerging and killing the player trying to plant the Spike.
Full Control of B

If you are confident enough to take control of the entire point B, then you should place smoke screens in entirely different locations than those seen above. In this situation, place smokes deeper and clear the remaining positions manually, making it harder for enemies to retake the position.
B Window


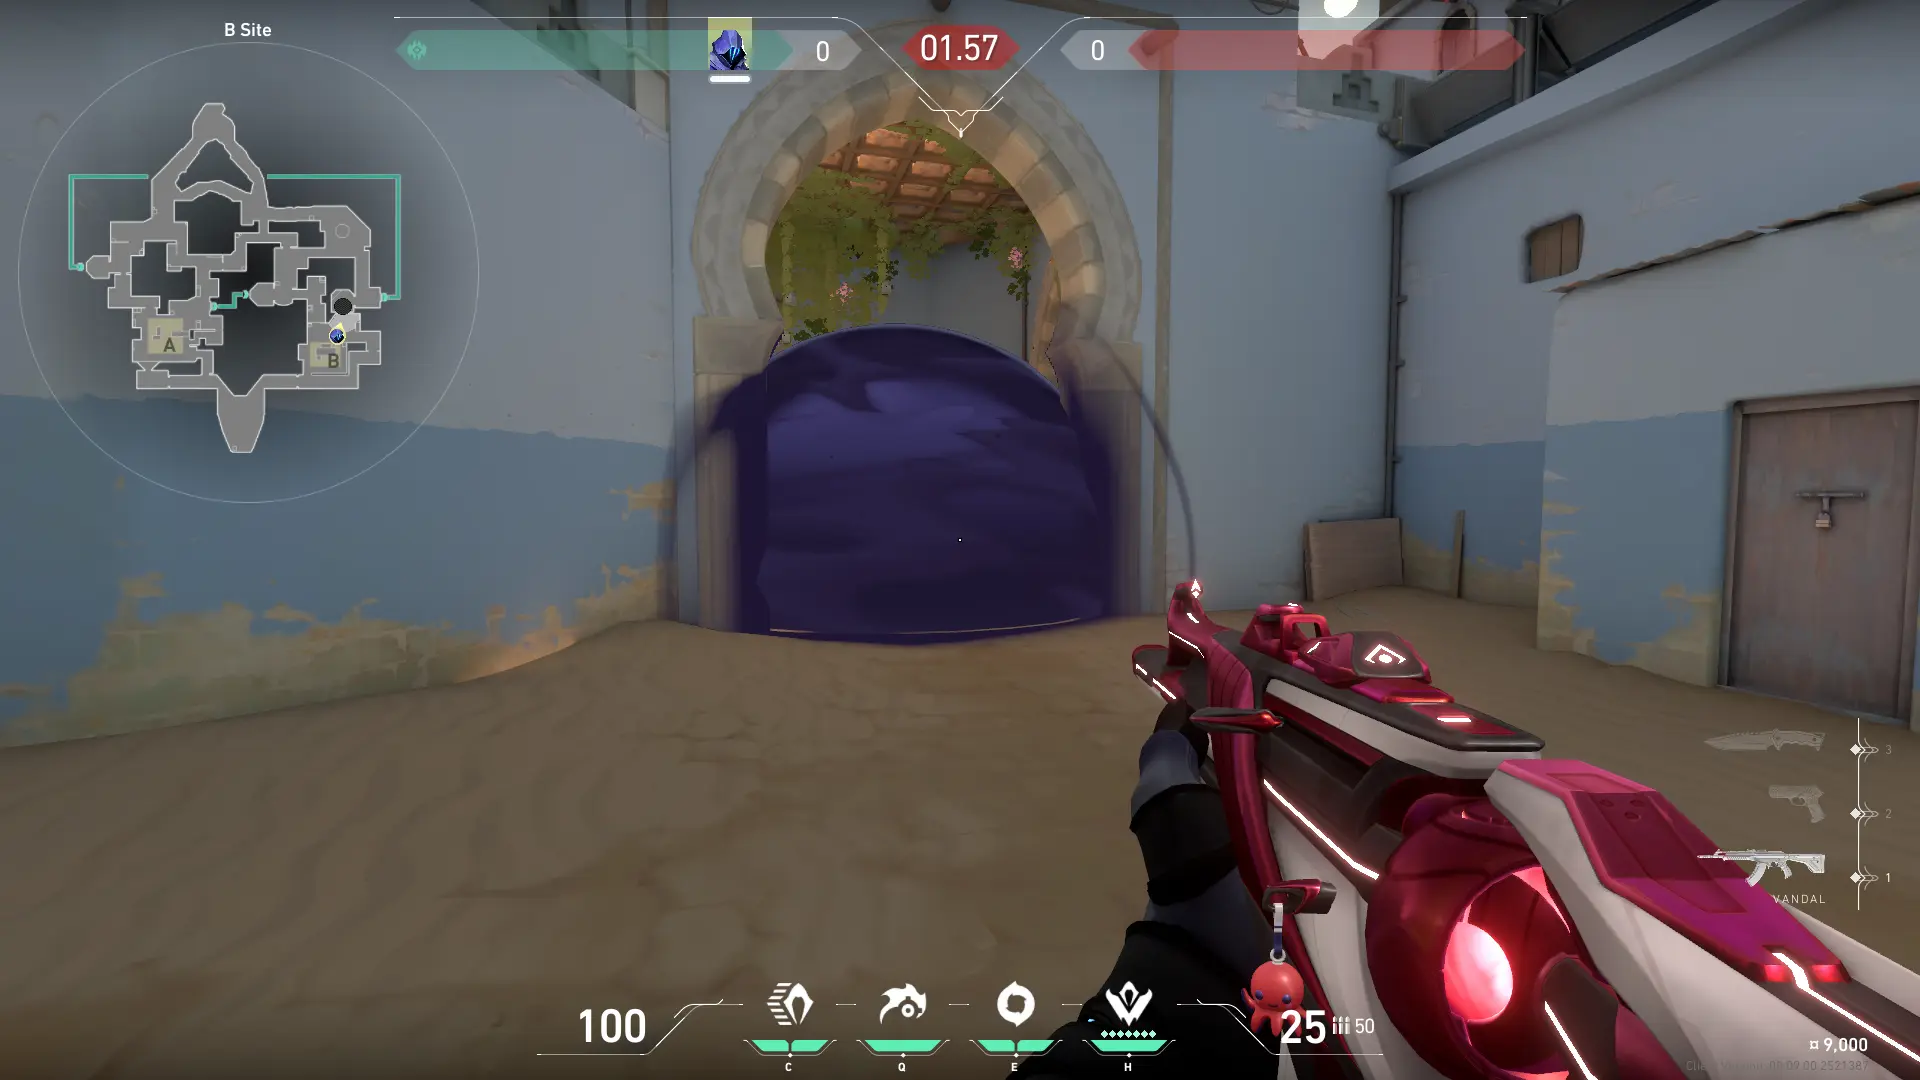
The Window position is one of the most important on point B and overall on the map, so it should not be relinquished without a fight. Losing this position gives the attacking side an advantage over the defence and creates more options for further actions. Below is one of the smokes that can help delay the enemy and prevent them from easily taking and exiting Window on B.
B Long

Most attacks use both Long and Window positions to advance to point B. Therefore, do not focus your attention only on Window. Below, you can see two types of smokes that, if used correctly and in cooperation with teammates, can not only hold back the attack but also eliminate them before they advance.
Conclusion
Effective use of smoke screens on Bind in Valorant is critical for success, but not all the options presented in this material are appropriate. The shooter from Riot Games values initiative and improvisation, so don't hesitate to use smoke clouds in other places. As you gain experience, you will understand whether it was necessary to use them there or not.


No comments yet! Be the first one to react