

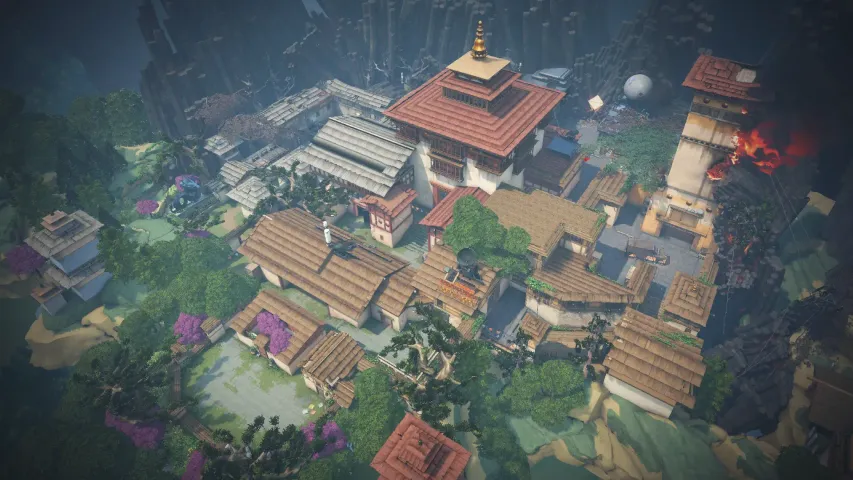
We continue to inform our readers about the best positions on each Valorant map for attack and defence sides. Today, we will discuss the Haven map, which was introduced during the game's beta testing phase. Like every map in Valorant, Haven is based on a real-world location, specifically Thimphu, the capital of Bhutan. Notably, Bhutan is one of the most difficult countries for tourists to visit, so the Haven map allows players to get a glimpse of this mysterious kingdom. Today, the Bo3 editorial team has prepared material for you, detailing the best places and positions on the Haven map for both defence and attack sides.
Point A
1

Opening our list is the window located right at the exit from the defence spawn point. Although this spot is not secret and is known to most players who use it, its effectiveness remains undiminished. From this position, you can have a great view of the entire Spike planting area and control two entry points from the enemy side. Additionally, the window’s unique feature is that it is well-protected from enemies since it has only one entry, which is quite easy to control. When playing in this position, sniper rifles and one-shot kill weapons like the Guardian are ideal.
2

The second spot on our list is more dangerous than the previous window, but placing a player there is sometimes necessary when you are outnumbered. From this position, you can control only one primary entry point from the enemy side. Besides, the player can monitor the only passage located behind the defence side. Due to Haven’s large map size, there are sometimes instances when the enemy easily flanks you through points B and C, ending up behind your team. To avoid such situations, you need to monitor your back more often, which is very convenient to do from this spot. It’s worth noting that using both of the above positions, even two players can effectively defend the plant, but it won’t help you during enemy rotations.
3
The last spot on point A is quite risky, but with a certain degree of skill and luck, you can not only relay vital information about the enemy to your team but also completely cut off the attack on plant A. The main problem with this position is that your opponents can even at the preparation stage move to the point marked by the arrow in the screenshot, while you move to this spot with a slight delay of a few seconds. Additionally, the distance to the enemies plays a significant role, making the Operator, which is expensive and unavailable in early rounds, the most effective weapon here. However, if all circumstances align favorably and you occupy this spot with a sniper rifle in hand, the enemies are likely to start the round without one or two players and may even change their attack direction.
Point B
1

Point B is considered unfavourable for the defence side because it is mostly very open and has very few covers. Therefore, the first spot that is well-suited for defenders is right by the doors at the entrance to the site itself. From this spot, players can monitor two possible attack directions. Besides, the defence side has a timing advantage, as they can immediately monitor the crucial mid-window, while the attacking players can only approach it a second after the round starts. However, this position has a major drawback in that you cannot see the adjacent doors entirely, so if enemies enter through them, you may simply not notice it. The distance to enemies from this spot is medium, so players can effectively use both regular rifles like Vandal and Phantom, as well as machine guns like Ares and Odin, to prevent enemies from peeking from the window, whose walls can be penetrated.
2

The next spot on point B is quite risky but allows for a fully hidden play. Moving to this position is advisable when you are outnumbered and the enemies definitely plan to capture plant B. However, this spot has many drawbacks, the first of which is the lack of an opportunity to retreat and rotate, so if you are pinned down here, escaping will not be possible. Moreover, the position is quite cramped, making it easy for enemies to bombard you with abilities. But even if the enemy agent choices do not allow for this, they can easily use regular bullets, as the wooden wall protecting you is fully penetrable. Ultimately, this position is very challenging to hold, so we recommend carefully considering all aspects before occupying it.
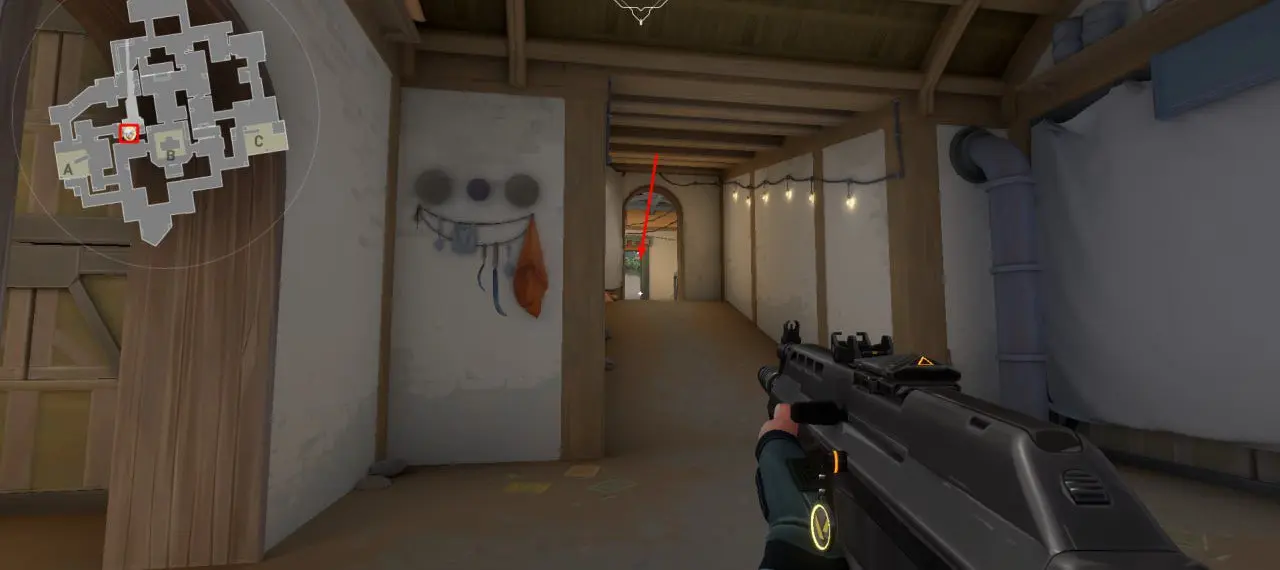
3

The last spot on point B is one of the best in this location, but it is very difficult to reach. From this spot, you also play hidden, but you can control all three entrances to the plant. Besides, you can jump onto the crates in the middle, marked with a blue arrow, to have a better view of the central part of the map. However, as mentioned above, reaching this excellent spot is not easy, and only a few agents can do it. Among them are Omen, Jett, Raze, and Sage with the help of Barrier Orb. Interestingly, the latter agent, thanks to her ability, can not only reach this spot but also simultaneously block one of the entrances to the plant, either the central one or from point C.
Point C
1
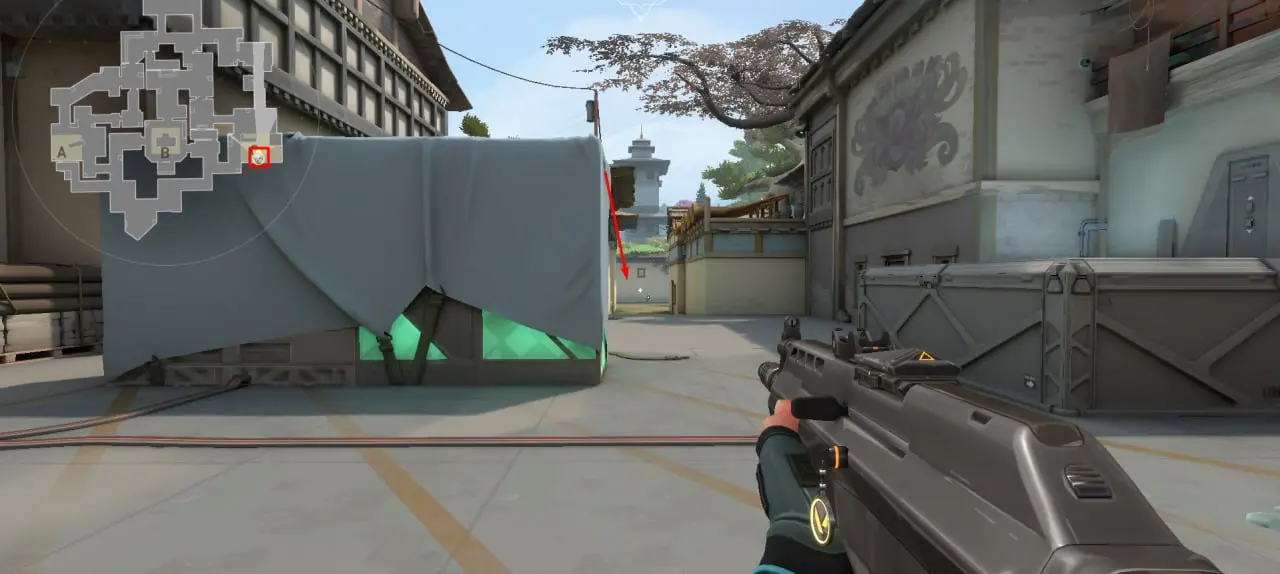
The first spot on point C is quite unusual. Typically, to control the long passage, players prefer the large crate on the right or the corner right at the exit from the same side. However, in our subjective opinion, this position is the best. Firstly, the distance to the enemy from this point will be greater than from others, so if opponents lack sniper rifles, it will be harder to kill you with one shot. Moreover, this position allows for an effective rotation, moving out of the line of fire, while if you hide on the right side, enemies can simply pin you down there and bombard you with abilities. However, such a distance from the enemies allows effective firefights only with sniper rifles, so this aspect should also be considered.
2

The next spot allows you to wait for enemies in hiding while simultaneously controlling the mid-passage. It’s worth noting that this position will enable you to rotate to another plant and also surprise enemies planning their rotation. Meeting enemies at this spot with the automatic shotgun Judge or machine guns Ares and Odin is excellent.
3

The last position on point C pertains not only to this plant but also to the previous point B. While from this spot, you cannot fully control either plant, it allows you to gather a lot of information about enemy movements. Moreover, if the player turns left, they can also see part of the area on point B, marked on the minimap. Thus, although you partially, you can control two Spike planting points at once, making this position good when playing outnumbered or even if you are alone against the enemies.
Conclusion
As can be understood after reading the material, the Haven map has fewer unusual and useful spots, but this is only because the map has three Spike planting points, making them smaller in size than those on maps with two points. In the future, we will discuss the best places for the attack side on the Haven map, so keep following our portal.


Comments