
We continue to talk about the best spots on all maps in Valorant for both sides of the game. Recently, we discussed the defense side on the chilly Arctic map Icebox, so today it's time to look at the attack side. Despite the map having only two plant sites, it is not considered significantly better for defenders, due to a large number of passages and ziplines that sometimes create problems. Today, the Bo3 editorial team has prepared material for you, where we will talk about the best spots on the Icebox map in Valorant for the attack side.
Point A
1

The first spot is located in the passageway towards the plant site. From this position, you can relatively safely check for enemy presence on the installation platform, ultimately securing the Spike placement. The main problem with this position, as with any on point A, is the number of passages and corners where an enemy can be lurking. Therefore, it is recommended to wait a few seconds, allowing enemies to start coming out and check your presence, after which you can clear your way to the plant. There is no special weapon recommendation for this position if you plan to be one of the first to enter the plant, you should use a weapon that is effective at close and medium ranges. If you prefer sniper rifles, then you should stay in a position where you can effectively use your weapon due to the distance.
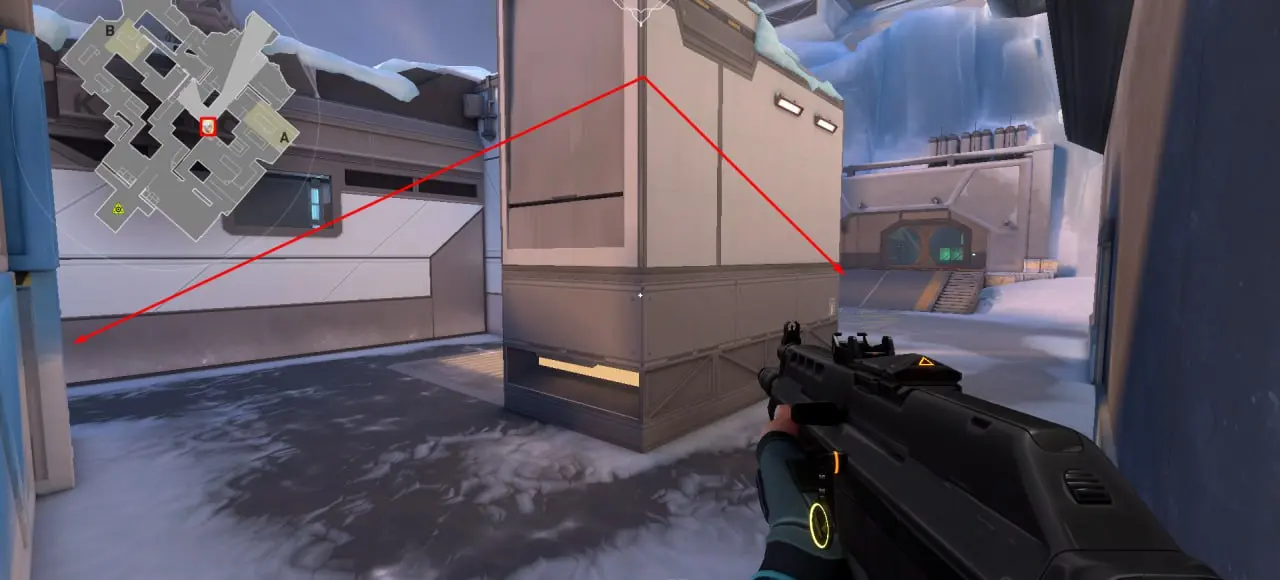
2

The second spot on our list is similar to one of the positions for the defense side but with a difference in placement. This point is located at the very corner, which will allow you, with the Spike installed, to fully control the entire platform and numerous passages. The peculiarity of this place is that enemies moving above you on the platform cannot find you. In turn, you will know about their location thanks to sounds and wait for the right moment. They also will not have the possibility to check this corner without certain skills, so they will have to descend where you will already be waiting, ready.
3

The next spot is located on the same platform as discussed in the second point, but on the opposite side. The peculiarity of the position is that it offers a broad view of the entire platform. From this point, you can monitor all possible passageways to the plant to effectively defend the installed Spike and prevent enemies from approaching it. However, this spot will not be effective when you are alone against several enemies, as it is simply impossible to control each passage on your own. Therefore, it is recommended to use this position when your allies are also partially monitoring different directions to provide necessary information about enemy advancement.
4

The next two spots on our list are outside the plant area. The first one is located right before the passage to the platform discussed in the previous point. This spot combines excellently with the third position. For example, if your teammate is at the previous spot and another is monitoring the passageways from the attack side. Then it would be advisable for you to step out to this point to monitor the passage from plant B and stop enemies or provide important information. If there are not many players left on your team to hold all positions, it is possible to continuously rotate between the 3rd and 4th positions. This way, you can control more passageways, but at the same time, the effectiveness will decrease.
5
The last position on point A is also located far from the plant, and it can also combine with other points. From this position, you can control the central part of the map to inform your allies about enemy advancement. The main problem with this position is that it is almost impossible to escape from there. You are located in a closed corner where there are no shelters, so if an enemy emerges from the direction you are not looking at, you are most likely dead. But this position combines well with the 4th point because you can assist the team and monitor enemies.
Point B
1

The first spot on point B is located right at the entrance to the plant, from the attack side. This position had already been featured in our material where we discussed the best spots for the defense side, but it is quite universal and effective, so we decided to mention it again. Most players attacking plant B use this spot. From there, you can monitor the platform and the platforms located above. Such a view allows you to use the position not only when your team enters the plant but also when the Spike is already installed, to protect it. However, the main problem is the great distance to opponents, so sniper rifles, which compensate for the distance issue, come in handy here.
2

The second point is located directly on the installation platform, in the corner near the boxes. You can reach it right after passing from mid, but usually, enemies keep a good watch on this direction. Even if you have managed to reach the position without trouble, do not forget that on the right side, beyond your field of vision, there is a window that leads directly to the spawn point of the defense side. Thus, it becomes clear that this position is quite unprotected and challenging, but if you need to control the central part of the map and exit from it, you can try to occupy this point.
3

The third position is located not far from the previous one but at a higher level. There are several ways to get here. The first is by using the ziplines on the plant itself, the second through the window located on mid, the third is the container tunnel also on mid, and the last is from the direction of the defense side spawn. From this position, you can control each of these passageways, as well as the plant itself and the installed Spike. The peculiarity of point B is that the Spike can be installed not only on the ground but also on high platforms, where you are located. Thus, you do not necessarily have to constantly monitor the lower levels and jump down to harm the opponent. It is only necessary to install the Spike on an adjacent platform to safely control it.
4

Next, we have a rather unusual and dangerous place from which you can control part of plant B. It is located, surprisingly, with its back to the spawn point of the defense side and plant A. Although at first glance the place seems strange and even foolish, such a position sometimes has a place to be. Use it only when there is information that instead of defending, the enemies have instead started to aggressively attack your team and are moving from the direction of your spawn point. In such a case, they are likely to come out behind you, so it would not be superfluous to control your rear. In addition, you also need one or several of your teammates to monitor plant A and the central part of the map, because opponents are likely to be in that direction as well.
5

The last place on point B is located right on the plant, near the third position, which is placed on the platforms. From this point, you can also covertly control the Spike, but as with all closed positions, the main problem is that it is very hard to get out. If the enemy has cornered you from both sides, the chances of escape are almost none. Your only chance for rescue is to quickly climb up to the upper platforms, which only a few agents can do, or retreat back through the window to get to the central part of the map, from where you can rotate.

Conclusion
After reading our material, you have learned about the best spots on the Icebox map in Valorant for the attack side. Continue to follow our portal to learn more about other available maps in the game, as well as about the upcoming 11th map, Abyss, which will soon be available in Valorant.


No comments yet! Be the first one to react