

The Bind map in Valorant remains one of the most popular, despite being one of the three original locations added during the beta test period from April to May 2020. Since then, seven new maps have been added to Riot Games' shooter, yet Bind has not lost its charm. Recently, we discussed the best spots for playing on the defence side on Bind, so today it's time to talk about the attack side. It should be noted that there are thousands of spots in each location in Valorant, but we will only discuss the best ones, according to the subjective opinion of the Bo3 editorial team.
Point A
1

The first spot on our list is right at the entrance to point A. Getting to this spot quickly allows you to effectively control the window, a favourite among players on the defence side. It’s worth noting that this spot has several drawbacks, the first being the boxes to the right of the entrance. Enemies, especially if they include agents like Omen, Jett, Raze, or Sage, often perch on top of these boxes, so it's advised to check for opponents immediately. Moreover, if you engage in a shootout and decide to take cover behind the small wall on the left, don't forget that it can be shot through, which your enemies might exploit. When choosing weapons here, everything is quite simple, although Operator and other sniper rifles are great for engaging players occupying the window, but the direct path leads onto the Spike planting site, so a medium-range weapon is recommended.
2

The next spot was mentioned in our previous article, but it is even more effective when playing on the attack side. If you manage to enter the plant and set the Spike, this position allows you to excellently meet enemies rotating from point B. From here, players can control three directions simultaneously, which opens up many opportunities but also poses a risk if enemies appear from two or all three directions. Agents who can quickly escape and change positions, such as Chamber, Jett, or Phoenix with his ultimate, handle control of this spot well.
3

Another position is right on the Spike planting site. If you have managed to enter the point, this location opens up numerous possibilities. Positioned here, you can control the narrow passage on the left side, and if you peek out a little from behind the boxes, you will have a view over the entire plant. This spot can be used variably; with smoke from you or your allies, you can easily plant the Spike and control it from the same point. It is also perfect for an ambush if your allies have rotated to the B plant, allowing you to stay back and prevent enemies from quickly moving through the portal and flanking your teammates.
4

The last position on point A allows you to play defensively. After your team has planted the Spike, staying in this spot will easily allow you to meet enemies returning to defuse. A special feature of this location is that an opponent coming up to the window will not be able to see you until they appear in your line of sight, allowing you to stay relatively safe on the point. It’s worth noting that this is an excellent spot for using shotguns like Judge and Bucky due to the close distance to enemies.
Point B
1
The first spot on point B is also right at the entrance to the Spike planting site. Getting there is a challenging task because you need to pass through a long, narrow passage that is easily shot through. But if you manage to reach this spot, you will bring significant benefits to your team. From here, you can easily flank enemies, provide crucial information about their locations, and simply eliminate them. Note that if you play agents like Omen and Jett, you can quickly rise to one of the indicated points to fully control the location. With agents Raze and Sage, this is not as easy to execute because the ascent takes more time, during which you might be simply eliminated.
2

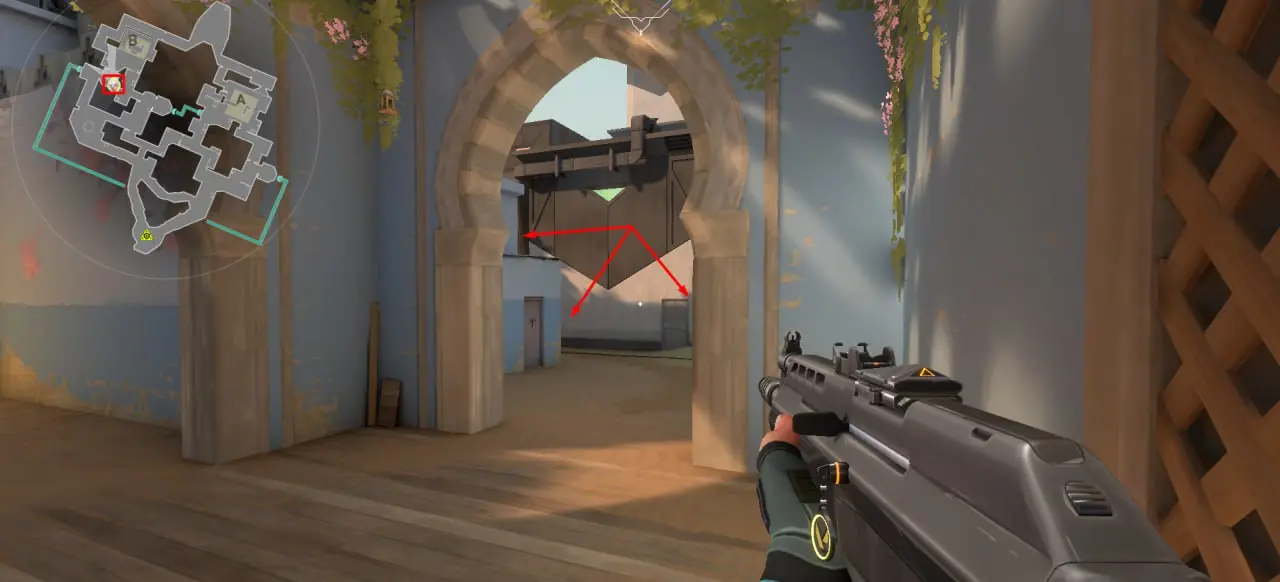
The next spot is more central on the map but also relates to point B. You can also reach this spot through a portal, which immediately transports you there. From this position, players will control two possible exits from the point, in case enemies exit the defense and play aggressively. As with one of the positions on point A, you can also stay here to allow your allies to rotate and delay enemies crossing through mid.
3

Immediately after the previous spot, we can recommend this window. Although this point is very popular, it's worth mentioning. Positioned here, you will have a full overview of the entire plant, with two exits and the Spike planting site itself. However, don't forget that enemies conducting a rotation from point A through the portal or the central part of the map can easily approach you. Also, the window and its walls can be shot through, and the room's size allows enemies to throw unpleasant skills at you.
4

This position is advantageous when your team has already entered point B and planted the Spike. Although staying here allows you to control only one passage from the defenders' spawn, not everything is so simple. It's advisable to press forward against the wall and turn around, giving you a good overview of the passages located behind. We do not recommend hiding in the metal box in the middle of the location, as it is the first place the defence side will shoot through and throw skills at.

5

The last spot in our list is located in the corridors leading from the defenders' spawn point to location B. It's worth being here when you have information about enemy agents on point A while your team has already planted the Spike on B. The long passage with only one direction can be effectively held using the Operator or other sniper rifles. Initially, you will only see the heads of your enemies, so even the lower damage from Marshal is compensated by this advantage.

Conclusion
After reading our article, you learned which spots on the Bind map are better to use on the attack side. It should be noted that it is not always possible to move to a better position, so improvisation and adapting to the situation are recommended. Keep following our portal to learn about the best spots on other maps in Valorant.


No comments yet! Be the first one to react