

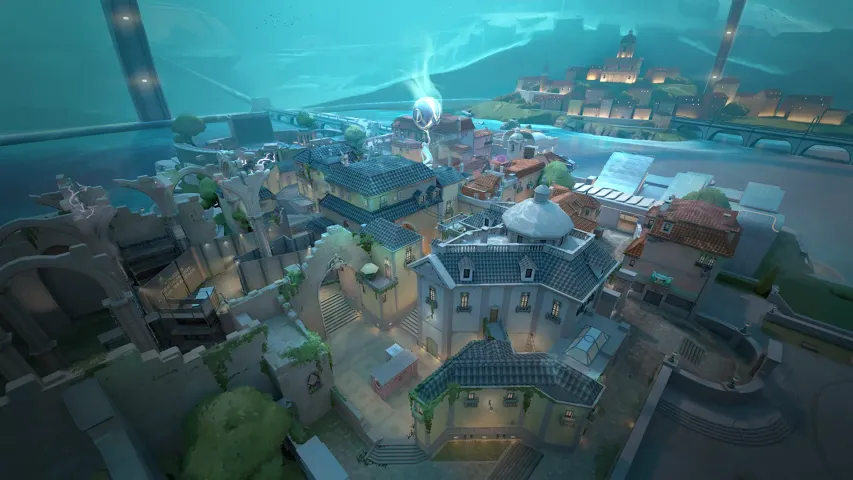
We continue to tell our readers about the best spots on all maps in Valorant for both sides. Today, it's time to delve into the mysterious and underwater map of Pearl, which was added to the game on June 22, 2022, along with update 5.0. This dimly lit location only has two Spike planting points and is considered better for the defense side due to their specific characteristics. Additionally, the Pearl location plays an important role in the Valorant lore. According to the story, multiple cataclysms occurred on Omega Earth, and the underwater dome that serves as the Pearl map remains one of the few sanctuaries for agents living on Omega Earth. Today, the Bo3 editorial team has prepared material for you, where we will discuss the best positions on the Pearl map when playing on the defense side, at both Spike planting points.
Point A
1

The first position at Plant A is located outside the main site itself, which means the position is less covered and more dangerous. From this spot, you can be the first to encounter enemies and try to stop their attack on Plant A. However, the position is quite dangerous because there is open space between you and the enemies, which can both provide you an advantage and the opposite. The main problem is that most likely your teammates will remain on the plant and defend it, while enemies might attack in your direction, potentially outnumbering you. Therefore, we advise assessing the situation and returning to the site if enemies outnumber you.
2

The second position, unlike the previous one, is of a closed type, allowing for safer defense of Plant A. From this point, you can simultaneously monitor two approaches to the plant, from mid and the A direction. However, this position has several drawbacks, the main one being that there's literally nowhere to run. If enemies advance from both directions simultaneously, you will likely perish. Due to Valorant's characteristics, almost every agent has damaging abilities, so such a position without a retreat option might end up backfiring. In case of danger, we recommend moving back to the position we will discuss next.
3

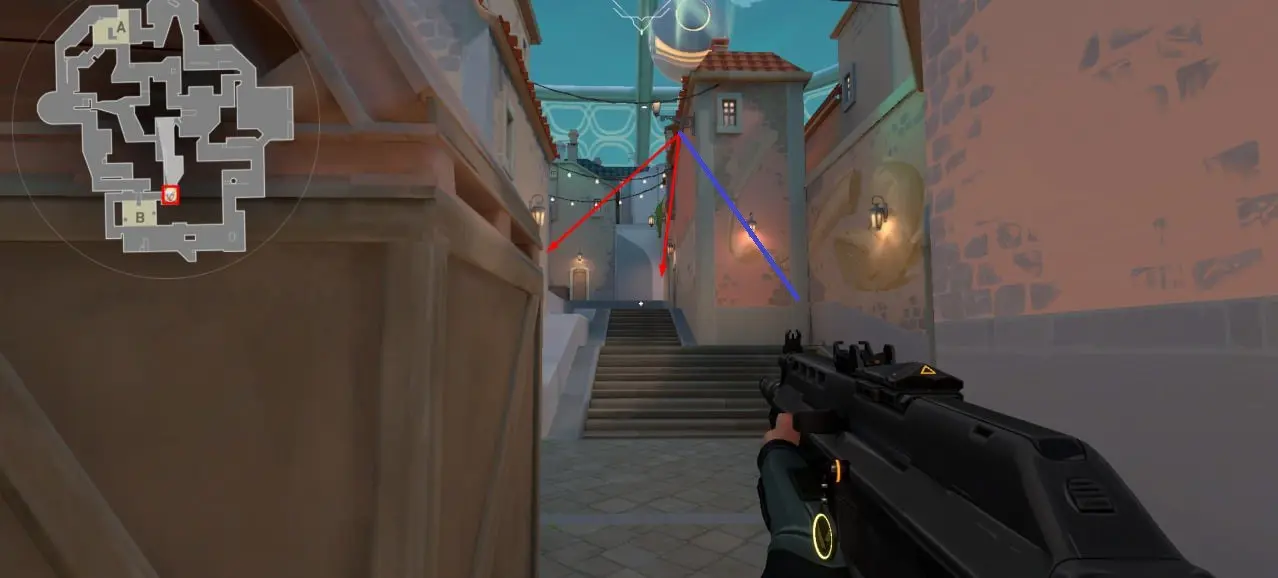
The safe position we mentioned above is located on the far left side of Plant A, in a corner that is covered by a wall. This spot can be used differently, but it is usually occupied by defense players who are outnumbered and need to safely stay at Plant A or simply save weapons and abilities for the next round. As mentioned earlier, you can also move to this spot from the previous position if you start getting pressured. However, there is one important feature at this spot related to enemy visibility. If you are at the position shown above in the screenshot, enemies on the plant itself can see you if they jump. Therefore, we recommend taking a position by the wall marked with a blue arrow. Although this reduces your viewing angle, it will make it harder for enemies to find you, increasing your chances of successfully saving weapons or winning the round.
4

All previous positions were focused on defending the side of Point A or the plant itself, but don't forget about mid, where enemies are also likely to advance. From this spot, you can relatively safely monitor two directions. Usually, players choose a more aggressive position, which is located ahead by a small box. However, this spot has many drawbacks, the first being the hole placed at the very top of the wall. Enemies can easily check your presence with abilities, then inflict damage. The second drawback is that you cannot control another passage that also leads to mid. Therefore, we recommend using the position shown in the screenshot, from which you can not only monitor two directions but also timely retreat to the plant in case of danger.
5

The last point on Plant A is the safest and most protected, as it is located right at the exit from your team's spawn point. From this position, you can safely control the plant, focusing on sounds and information from allies. Also, this position allows you to watch your back, in case enemies plan to enter from the central part of the map or from Plant A. However, the narrow corridor does not allow you to maneuver, so if enemies find out your location, they will most likely kill you. This also applies to the three different directions that are impossible to control alone, and if enemies emerge simultaneously from two or more, you will also have no chance.
Point B
1

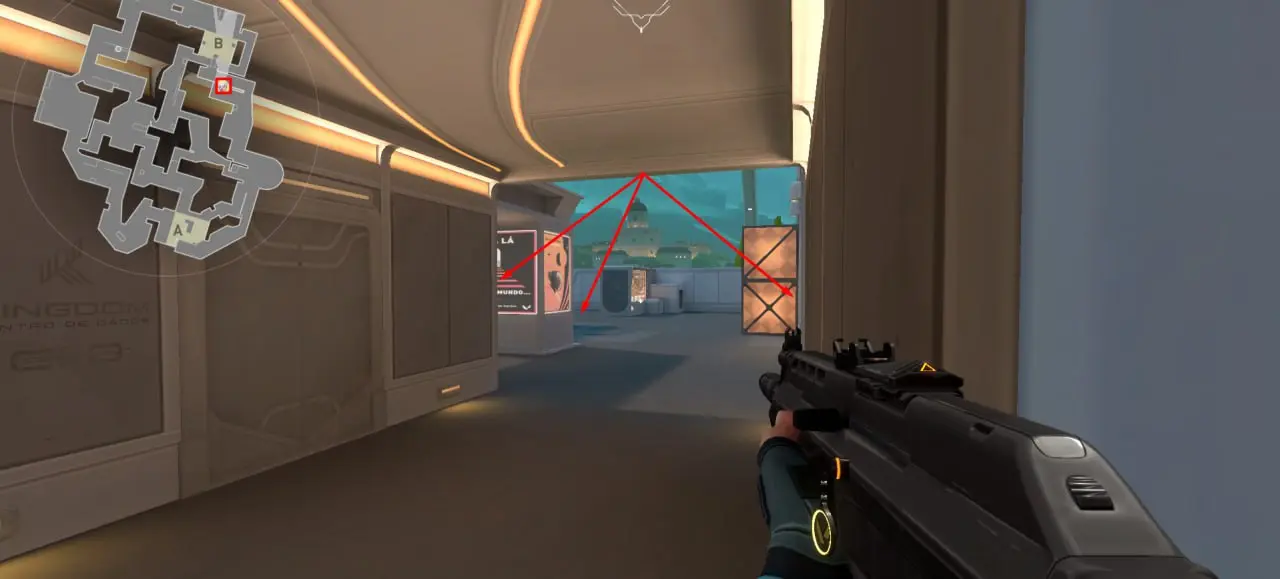
Point B is much easier to defend, all due to the spacious long corridor that attacking players need to overcome. Therefore, the first position in our list is related exactly to this passage. From this spot, you can monitor the long corridor and successfully stop enemies, and in case of danger, hide behind a box on the right side. However, this position also has several drawbacks. The first is the great distance to attacking players, so you need to use an Operator or other sniper rifles. The second drawback is that you may be cut off from your team. If you have hidden behind the box, and enemies have entered the corridor, you will almost have no chance to escape. Opponents will simply cut you off from your allies and constantly monitor your position. Therefore, if you are not playing agents like Jett or Omen, and you do not have an ally Sage who can cover you with a wall, you need to leave the position in advance.
2

The next point is located on the Spike planting site itself, and it allows you to monitor the long B corridor, as well as partially the central corridor. The position is of a closed type, and from it, you will be able to escape to a safe corridor behind, from where you can also move to the first position we mentioned earlier. Unlike the previous position, the distance to enemies from this point will not be so great, so you can use regular weapons like automatic rifles and SMGs.
3

From the third position, you will perform a function similar to the previous point, but it is located one level higher than the previous one. You can access it immediately upon exiting the spawn point. From this position, you can monitor the plant itself, as well as two passages. But unlike the previous point, being at this spot, you can also safely and covertly wait for the Spike installation. The thing is, the previous position, due to its direct placement on the plant itself, is quite dangerous when enemies have already entered the plant. But this place is located one level higher, and enemies will not be able to easily get here. You just need to monitor the only passage and orient yourself by sound to unexpectedly come out and make a few accurate headshots.
4
Another point, which is located almost on the plant itself, but allows controlling the passages leading from the central part of the map. It should be noted that since Point B is difficult for attacking players, they will most likely try to enter Plant A or advance through mid, so at the beginning of the round, do not forget about this position. From here, you can control the doors in the central part of the map to prevent enemies from sneaking up on you. But the problem here is the same as at the first point in our list, it is the distance to the enemies. From this position, enemies may appear in the doors, which are quite far away, so you either need to let them come closer or advance forward to a position marked with a blue arrow, or arm yourself with a sniper rifle.
5
The last closed-type position is located in the transition leading from the defense side's spawn point to the plant itself. Despite the fact that the point is quite protected from the sides, if opponents are in the majority, they can appear from the front from three different directions. A good solution when occupying this point would be a reliable ally who is positioned higher than you at position number 3. Thus, he can see the enemies first and provide you with the necessary information about their location and cover you.
Conclusion
After reading our material, you learned about the best positions on the Pearl map when playing on the defense side. Continue to follow our portal to learn more interesting positions when playing on the attacking side on Pearl, as well as about other maps in Valorant.


No comments yet! Be the first one to react