

Explore Wide Range of
Esports Markets

We continue to tell you about the best positions on various maps in Valorant. Recently, we wrote about spots for the defending side, so today it's time to discuss the attacking side. It's worth noting that Ascent is considered particularly strong for the defence due to convenient plant sites that are easy to defend and also because of the automatic doors at both Spike planting points. Despite this, the attacking side can also play effectively on Ascent, so today we'll cover the best spots on the map when playing offensively.
Point A
1

The first spot on point A is located in the right corner, just by the entrance to the plant itself. This position is fully covered and allows for the effective use of two strategies. The first is when your team has already planted the Spike, and you move to this spot to rely solely on sound cues. If you hear the enemy beginning to defuse the Spike, you simply approach the passageway to disrupt their attempt. The second strategy involves deceiving the opponents with an attack on A, then quickly rotating to plant on B. This can force the enemies to switch sites, and from this position, you can unexpectedly flank them to disrupt the rotation.
2

The second position was already listed for the defence side, but it is so effective that it couldn’t be omitted. Another enclosed position, it allows you to monitor the planted Spike. One minor drawback is that the ceiling, which serves as the floor for enemies above, is penetrable. This means that while entering the plant, the defence can check your location at this point and try to shoot you through the floor. However, the size of this hideout prevents enemies from being very effective, making the aforementioned drawback negligible.
3

Unlike the previous positions, the next spot on our list is completely open, and you're only shielded by a small corner between the walls where you're positioned. Despite this, the spot allows you to control two entries to the plant, but it requires certain conditions for effective use. The first is reliable allies who will monitor the last passage from the defenders’ spawn, and the second is the automatic doors located in the right passage. If either of these conditions is unmet, the spot becomes very dangerous, as you cannot simultaneously monitor both passages and your back.
4

Another enclosed position, which is ideal after your team has taken control of the plant and planted the Spike. From this point, you can oversee the main direction of the enemy's rotation from the spawn, as well as the passage leading from the central part of the map. A notable feature of this position is a glass window through which you can monitor mid. It’s advisable not to break the window when taking this spot, as enemies close by may hear the sound, which also serves as a signal for them. If the window is broken, the enemies will anticipate an ambush and are likely to check your presence with skills and shots.
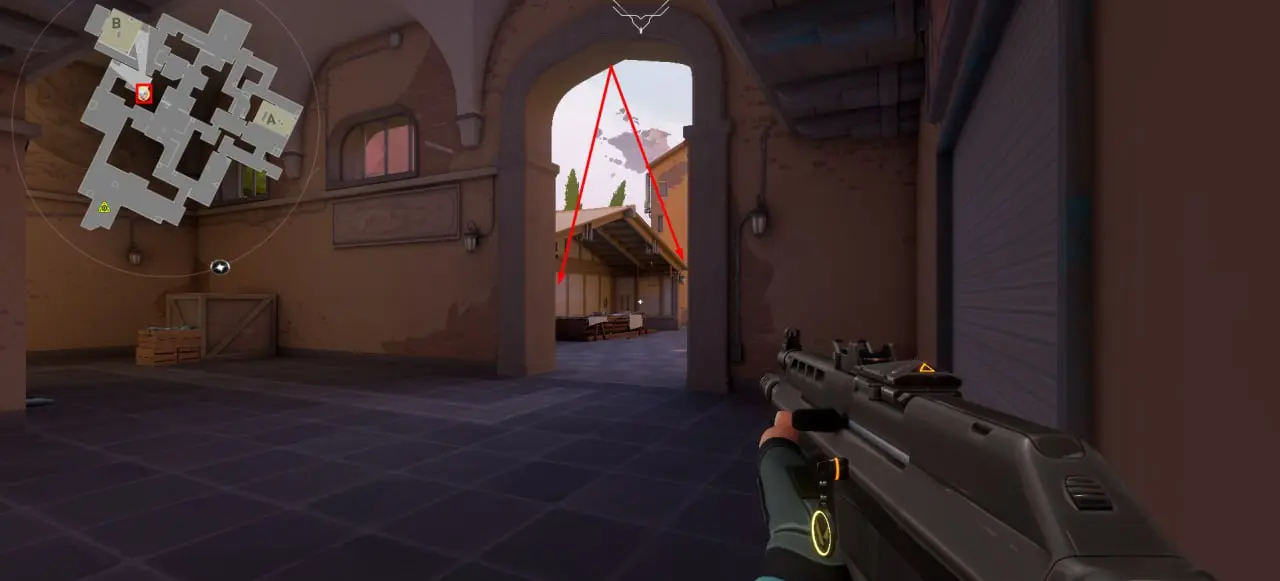
5

The last position on point A is quite optional and can be used in very specific situations. The main requirement for this position is having the majority of your allies present and full control of the plant. If your team has successfully taken the plant and planted the Spike, and your allies are positioned to monitor all passages, you can move to this spot. From here, you can control the main rotation path that opponents will use. Note that you can try to kill several opponents or simply delay them using various abilities that impede movement or cause area damage. However, the functionality of this position ends there, making it optional and not viable every round.
Point B
1

The first position on point B is located at the entrance to the plant from the central part of the map. This spot is versatile and can be used both when attacking the plant and when defending the Spike. If you enter the platform through this position, it's recommended to break the automatic doors in advance, which will likely be closed, and wait a bit before entering the point. It's difficult to effectively control the Spike from this position due to the large distance to the plant, but you can wait for enemies to enter the position.
2

The second position, unlike the first, is completely open but still has expanded functionality. First of all, from this spot, you can control both entries to the plant when your Spike is already planted. The position can also be used when your team is just entering the plant. Simply throw a few smokes, and with their help, you can sneak onto the plant to plant the Spike or simply assist your allies in effectively entering the location. Note that in case of danger, you can quickly go down and hide in a position we will describe below.
3

This spot has also been on our list before, but since point B has very few positions, all possible ones must be used. From this spot, you can effectively control the planted Spike and also move here from the previous position to be more protected. However, as we wrote in the material about the defence side, this point has many drawbacks, including two entries and a lot of open space, making it easy for enemies to kill you from a distance. Comparing this place with the second spot on point A, it is clear that the latter is much more functional.
4

The next spot is located deep on point B and close to the defenders’ spawn point. From this position, you can monitor the passage from mid and also from point A. However, this is also where the main danger lies, as enemies rotating from point A can see you immediately. In such cases, you should move to the corner marked with a blue arrow. From this position, you are more protected from enemies and can unexpectedly flank them.
5
The last position on point B is located right at the entrance to the plant. This position is not new and is usually used by most players. However, it can be used not only when entering the plant but also when the Spike is already planted. While positioned here, you can covertly observe the platform, but don't forget about your back, from where enemies may approach.
After reading our material, you have learned about the best positions on the Ascent map for the attacking side. Note that these positions are situational, and you need to choose them based on how the match is progressing. Continue following our portal to learn about the best spots on other maps in Valorant and other interesting details about the shooter from Riot Games.


No comments yet! Be the first one to react