
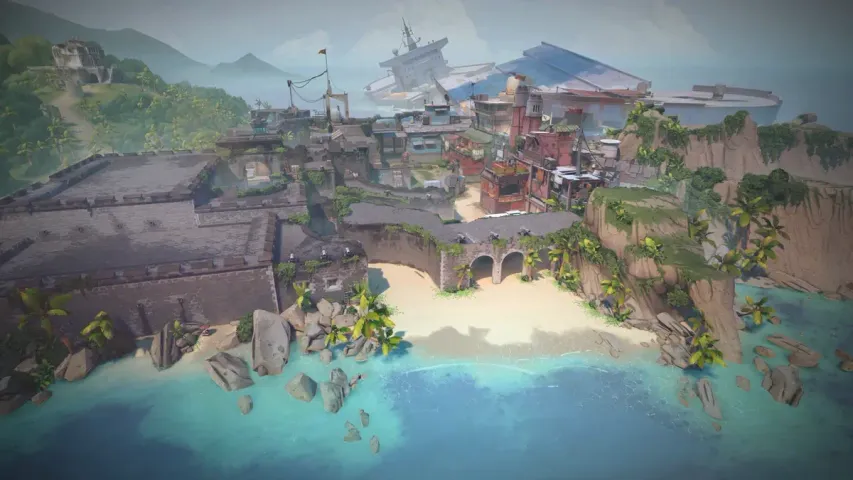
We continue to inform our readers about the best positions on all maps in Valorant for both sides. The map Breeze was absent from the general game rotation for a long time but returned to its fans after several months of redesigns and changes. Despite the changes, due to its size, the map still tends to slightly favor the attacking side, which, when utilized correctly, can give you an advantage. Today, Bo3's editorial team will tell you about the best spots on both plant sites of the Breeze map when playing on the attack side.
Point A
1
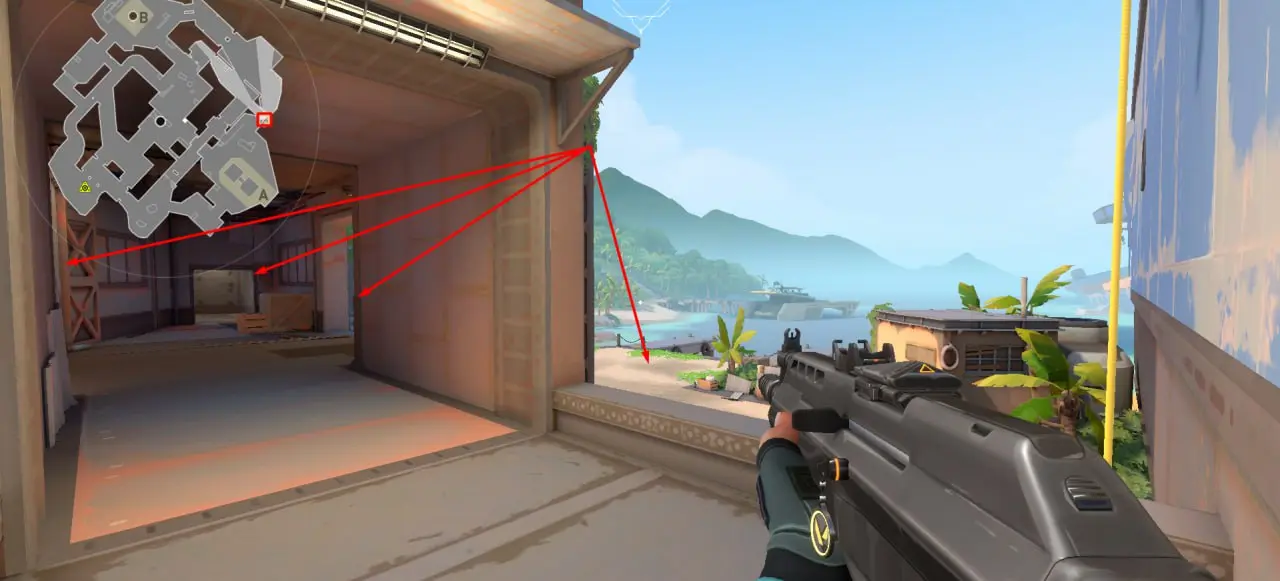
The first position when playing on the attack side is right at the entrance to the plant, and it won't be a surprise for players. But this position has another variation, where you are on the left side of the passage. Naturally, this spot is safer because you can always retreat and rotate from there. From this position, you can also control an important angle behind the boxes where enemies often hide before the round begins, and you will have a broader view of the doors and the passage leading to the central part of the map. As mentioned earlier, don’t forget about the main downside of this position—the difficulty in retreating. If your team decides to rotate to plant B, it will be very hard to retreat from this position.
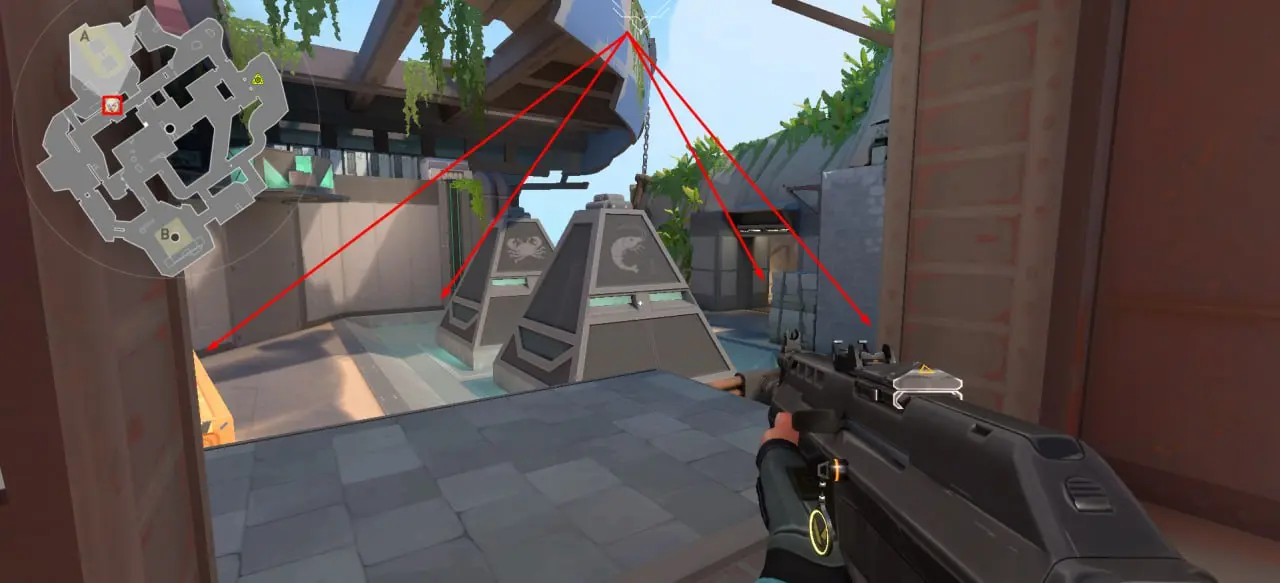
2

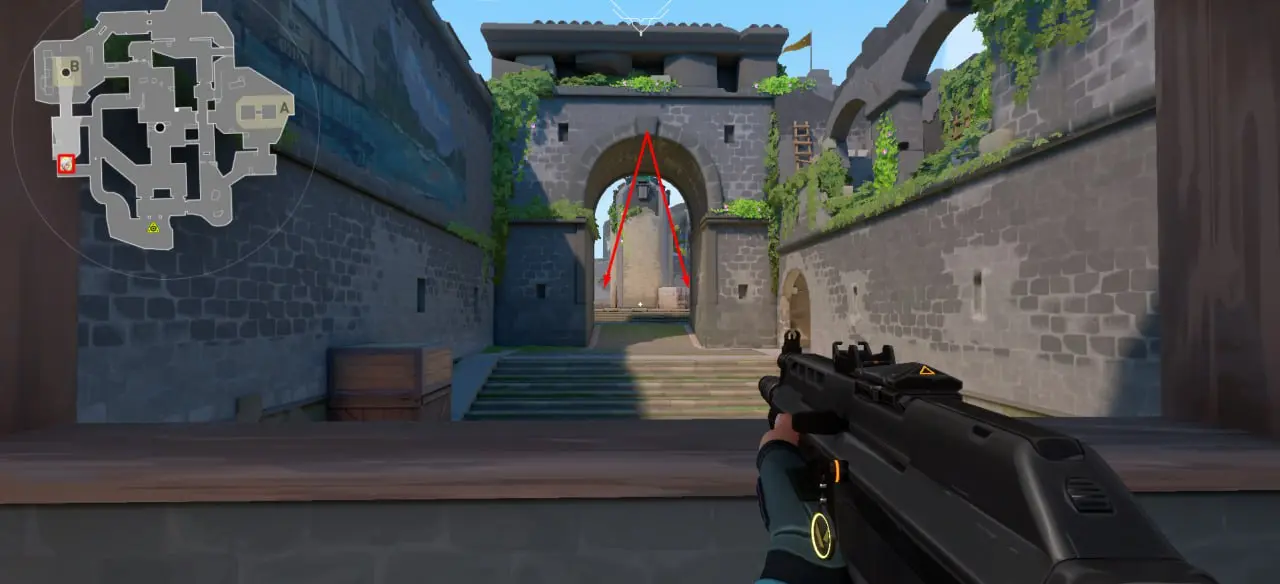
The second spot is on the plant itself and is best used when your team has entered the site and is planting, or has planted the Spike. From this point, you can oversee the defense side and partially the central part of the map, especially if the doors to mid are open. Although at first glance it seems quite dangerous because it is almost in the middle of the plant, the two large, bulletproof pyramids provide the main protection. Also, from this position, you can always retreat back to the passage that leads to your spawn or advance forward to occupy more advantageous positions that we will discuss below.
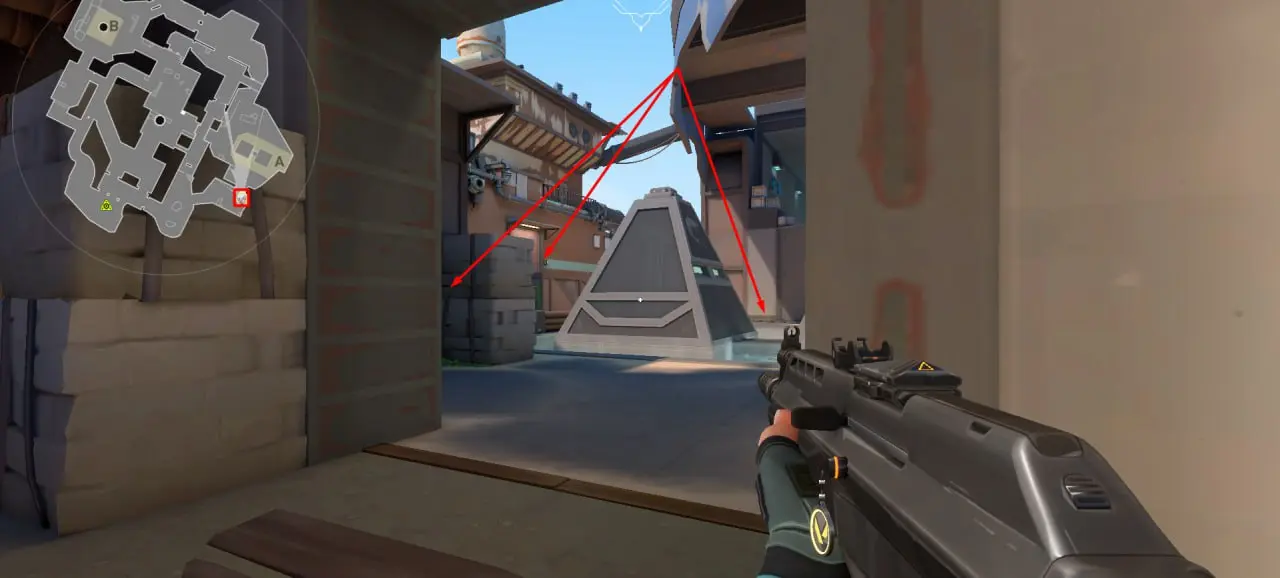
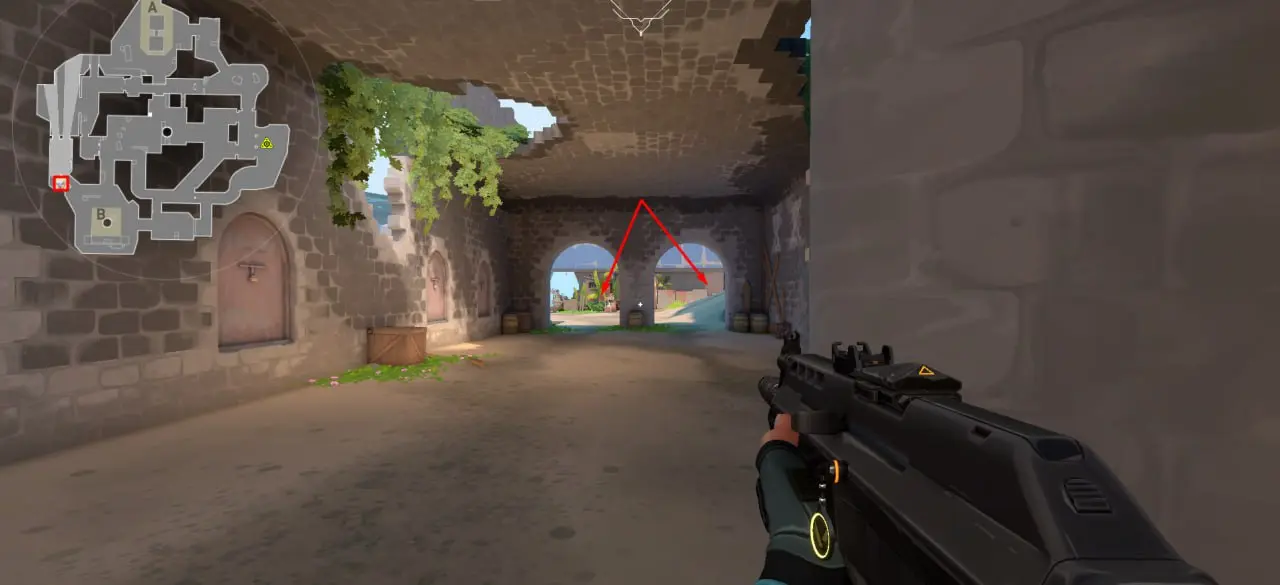
3
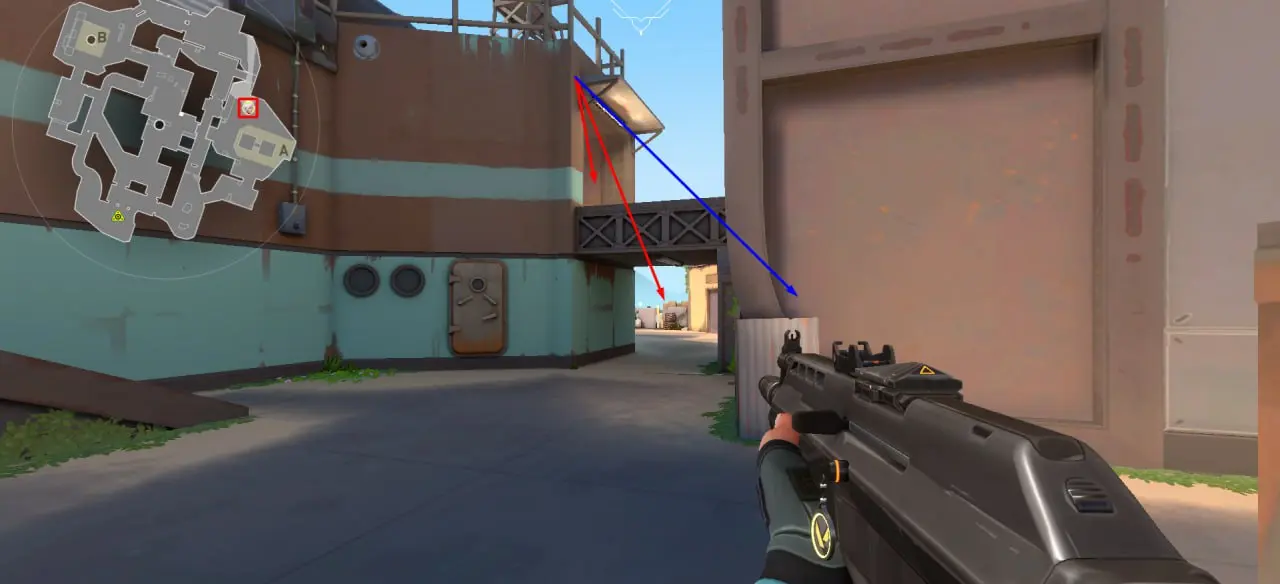
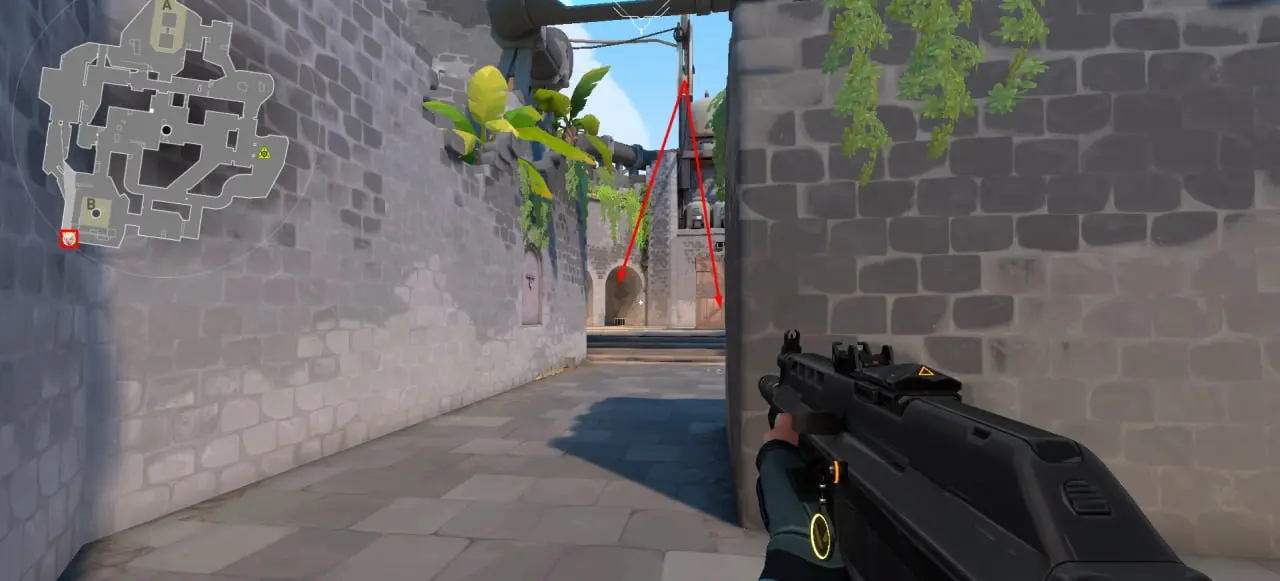
Another quite open position, yet it has its own features. From this point, you can oversee the last passage to the defense spawn and also a small elevation from where enemies might also emerge. While this position appears even more dangerous than the previous one, the real danger only comes from one direction. The fact is that your back is completely protected from enemies by a container, which also hides you. Therefore, it is enough for one or two of your allies to control the passage from the central part of the map and the automatic doors leading there. As a result, you will be focused only on the enemies in front of you, and if you are confident in your shooting accuracy, you might not even need to retreat to find cover. If cover is needed, however, you just need to move a bit forward and to the right, thus you will always have protection in the form of a wall, marked with a blue arrow.
4
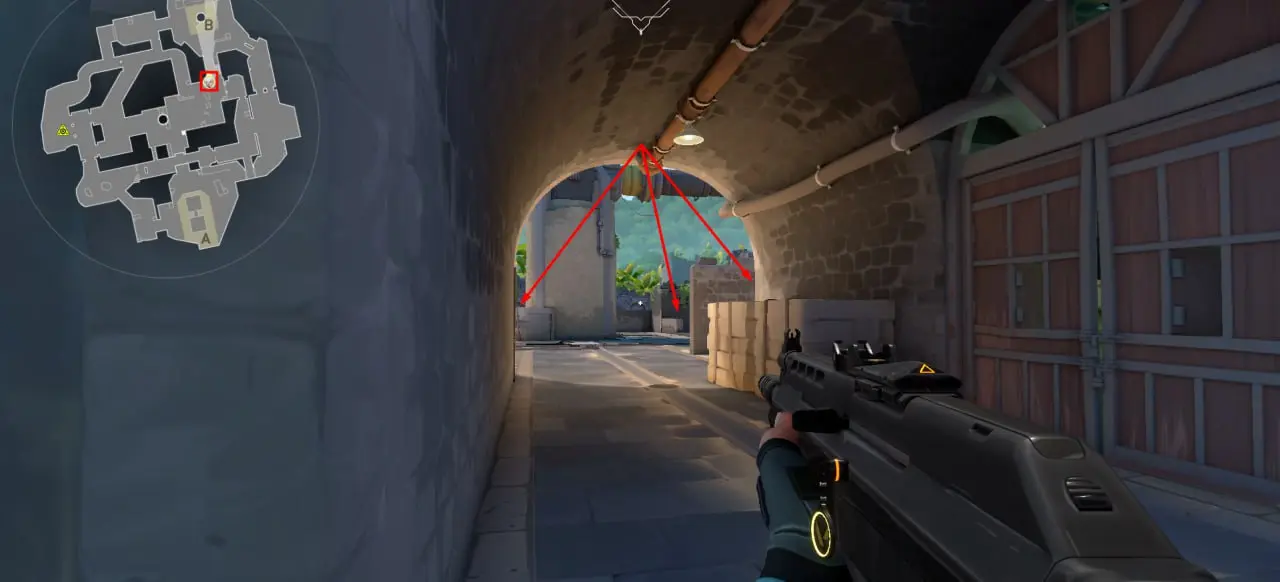
The position near the automatic doors has already been mentioned in our previous material when playing on the defense side, but its usefulness and tremendous functionality are worth mentioning again. As we discussed in the previous article, from this position, you have an excellent view almost over the entire point A. You can control most of the passages and cover your allies as they enter the plant and install the Spike. Also, this position allows you to play defensively when the Spike has been planted. You can simply close the automatic doors and, based on the sound or information from allies, safely wait for the round to end. Also, from this position, you can exit the central part of the map in three ways, making your rotation effective and unexpected for the enemies.
5
The last spot on point A when playing on the attack side is located close to the previous position, right at the exit from the closed corridor, towards the spawn point of the defense players. Although this spot is quite open, it is situated on an elevation, so it cannot be considered maximally dangerous. Use it when your team has entered the plant, and the enemies at plant B start to rotate and converge towards you. Given the size of the Breeze map, they are likely not to go through your spawn side or through mid because it would take more time. Therefore, in most cases, they will return through their starting point, where you will be waiting for them. But do not forget that a few enemies might still try to pass through mid, so it's important to keep track of information about the central part of the map yourself or with the help of allies.
Point B
1
The first position on point B is in the window at the entrance to the plant itself. This position is very well-known and is considered the best for snipers. Due to the long distance to the plant and the enemies, popular automatic rifles such as the Vandal and Phantom will not be very effective. Therefore, it is necessary to use one of the three sniper rifles, and if your credit allowance permits, we recommend preferring the Operator rifle. From this position, you are often to play a supportive role in helping your team enter the plant and install the Spike. But also, don't forget about enemy snipers, so we recommend paying attention to one of the positions we discussed in our previous material when playing on the defense side. It is likely that the enemy sniper will be located in the 2nd position, so we recommend taking care of them first.
2
Due to the peculiarities of plant B, which is divided into the main installation platform and a narrow passage on the left side, entering the point can be quite difficult. The second spot in our list concerns the latter passage. If you have entered this position, you have already played a very important role, namely checking for the presence or destruction of enemies in the narrow corridor, thereby securing an advantage for your team. After that, you only need to control the main passage that leads to the spawn point of the defense players, and if your allies by the team are watching the central part of the map and their own back, then most likely the round will end in your favor.
3

The next position is directly related to the previous one and can effectively be used only when your ally has occupied the 2nd point. This place is located right at the entrance to the plant, and it only appeared after the redesign of the Breeze map. From this position, you can control both passages to the plant, but it is best used in tandem with an ally. When your friend has occupied the second position, he can safely monitor one of the passages. In this case, your task is simply to monitor the central part of the map, and occasionally the back, if you have no more living allies. As a result, your team will have a very strong defense of the plant, which almost guarantees you a victory in the round.
4
The next position can be used when you enter the plant from the central part of the map. From this point, you can partially control the Spike installation platform, but you will not see enemies hiding in the narrow passage, which we discussed in the second point of our list. But this position has one significant drawback, it lies in the fact that your back is completely open. So, if not all defense players are on plant B, which is quite rare, you need to carefully monitor not only the enemies in front of you but also your own back, where opponents may unexpectedly appear and completely stop your attack.
5
The last position in our list is in the direction of the spawn point of the defense players and plant A. Use this place when your team has fully occupied plant B, and most enemies are on A. After that, they will conduct a rotation, and most likely the main direction of their movement will be precisely through your position. But you will notice the enemies, or they will notice you when the distance to them is quite large. This means that for effective killing at such distances, you need to let them come closer, or use sniper rifles. Also, do not forget about your back, so it is necessary that allies also monitor the central passage.
Conclusion
After reading our material, you have learned about the best positions on the Breeze map when playing on the attack side at both Spike installation points. Note that any position on the map can be used differently depending on the situation, so we recommend always first assessing the situation and the state of your and the enemy team. Continue to follow our portal to learn about the best positions on other maps in Valorant, as well as about the new location Abyss, which has appeared in the game today.


Comments