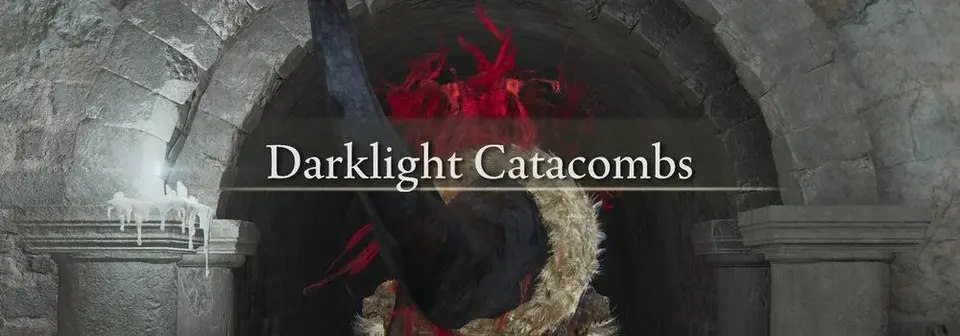
Among the many dungeons in Elden Ring, Darklight Catacombs stands out due to its complexity and challenging access. If you're interested in reaching Darklight Catacombs and completing it while gathering all its treasures, this guide is for you.
How to Get to Darklight Catacombs
Getting to Darklight Catacombs is no easy task, mainly because this dungeon is located in the hidden area of Abyssal Woods.
To start your journey to Abyssal Woods, enter Shadow Keep in Scadu Altus. After defeating the Golden Behemoth, go through a series of corridors and rooms to your left. You'll pass through a large dining hall guarded by two knights: one wielding a hammer and the other armed with a bow and arrows.

Ignore the horizontal stairs at the exit and continue straight along the path with flaming structures on your right. Stay to the left until you see stairs leading downwards.
Descend the stairs and run through the waterfall to find another set of stairs leading to the sewers. Turn right to find a painting and a hidden path between two lit torches on the right wall, which can be revealed by attacking the wall. At the end of this hidden path is a stone coffin. Rest in the coffin to be transported to the Castle Watering Hole outside Shadow Keep.
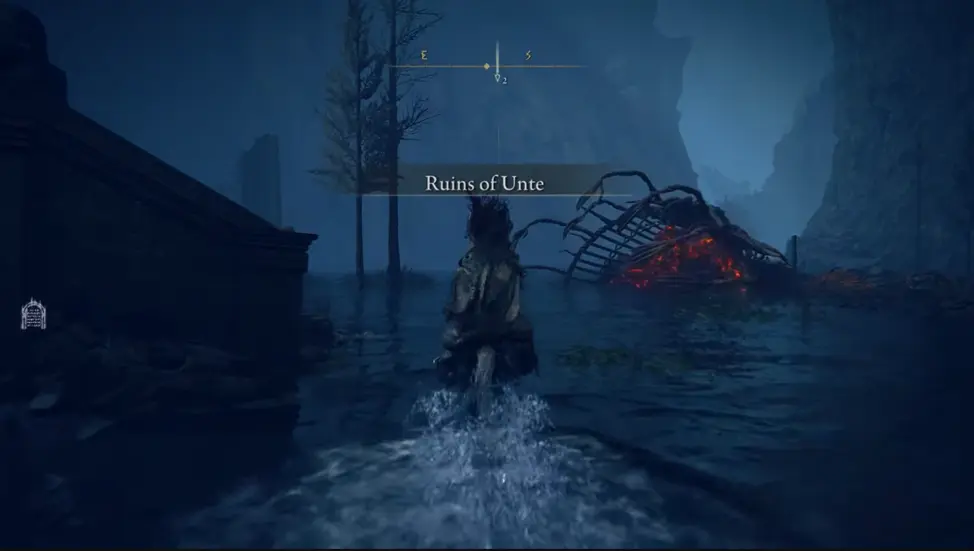
Ahead, you'll see the Ruins of Unte. Head southeast to find the Revered Spirit Ash. Then, go south past the active Furnace Golem and follow the path to the left of the waterfall to find a Site of Grace.
Jump across the gaps on the path until you reach a clearing with a lit altar to the left across the chasm. Continue south to find the next Site of Grace, Recluses' River Downstream.
Descend the cliff onto rocky platforms below and follow a relatively straightforward path down the mountain. Eventually, you'll enter a small cave leading to a graveyard. On the eastern side of the graveyard, you'll see double doors leading to Darklight Catacombs.

Darklight Catacombs Walkthrough
Open the doors to Darklight Catacombs. Descend the stairs and step on the lift button to go down. Activate the Site of Grace in front of you. Use a torch or lantern to illuminate your way through the dark corridors of Darklight Catacombs for easier navigation.
Ahead, near a stone coffin, you'll find a corpse. Search it to collect Grave Glovewort [5]. Be cautious, as a gargoyle will jump out from the left wall. After collecting the item and defeating the enemy, turn away from the coffin and head left down the stairs, collecting Yellow Fulgurbloom along the way.

Descend the stairs, turn left, descend again, collect another Yellow Fulgurbloom, and proceed right to another set of stairs down. In the room, you'll encounter two stone flower-like jumping gargoyles. Go left down the stairs or jump down directly to collect Yellow Fulgurbloom.
A cannon statue may attack you from the right passage; kill it, but proceed through the archway near the base of the stairs. Pull the lever there before continuing to walkthrough Darklight Catacombs.

Finding the Viridian Amber Medallion
Approach the railing and look down to see a ledge below. Descend to it and follow along the wall. Carefully drop to a lower stone ledge. Jump into the room ahead, unlock the chest, and collect the Viridian Amber Medallion +3.

Exit and jump down to a stone bridge, then go through the corridor under the room you were just in. Kill the enemy on the way. On the right, collect two Yellow Fulgurbloom, and on the left in the room, you'll find Grave Glovewort [1]. Exit the room, cross the lower bridge, and step on the lift button to go lower level of Elden Ring Darklight Catacombs.
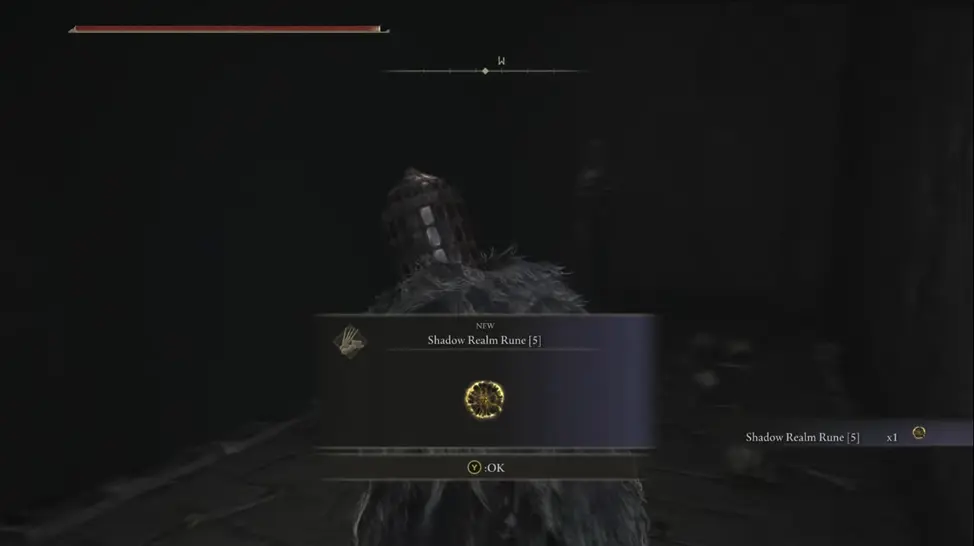
Proceed straight through the corridor until you reach a cliff near the stairs. Look down to see a narrow ledge you can descend to. Drop, walk along the ledge, and climb the ladder. Collect the Shadow Realm Rune from a corpse and kill the enemy to the right.
Jump down to encounter a stone flower gargoyle. Kill it and collect Ghost Glovewort from a corpse against the wall. Exit the room, finding yourself back at the stairs. Go through them and defeat another enemy. Behind large square columns is Yellow Fulgurbloom. Once you approach, a cannon gargoyle will descend.
Stand between two stone pillars, climb the ladder on one, and proceed through the right passage. Descend and pull the lever under the archway to the left. Jump down under the archway onto the stairs. Collect Thin Beast Bones from a corpse.

How to Obtain the Death Knight Armor Set
Near the top of the stairs, look down to find another small ledge. Jump onto it and enter the room. Immediately above you will be a hanging gargoyle and another enemy in the room. Defeat them to avoid interference. In this room, left of the entrance, lies a corpse. Search it to obtain the Death Knight Armor Set in Darklight Catacombs, including the helmet, armor, gauntlets, and greaves of the Death Knight.

Head to the opposite side of the room and descend the ladder. Walk along the ledge and enter the next room. To the right is a mage enemy; defeat him first. Then, collect Ghost Glovewort [9] to the left.
Jump down, defeat another gargoyle, descend the stairs, and step on the lift. Proceed forward, descending another set of stairs. Be cautious, as a giant cannon enemy ahead shoots fiery bolts.
Descend, run along the left side, avoiding the enemy's shots. Kill two enemies and quickly cross the bridge, dodging fireballs. Optionally, collect three Yellow Fulgurbloom along the way.

How to Obtain Great Ghost Glovewort
Reach the room ahead and pull the lever to lower the platform with the cannon enemy. Run to the enemy and kill it to collect Great Ghost Glovewort. Face the bridge you crossed and go left. You'll find a tunnel with an enemy, two Yellow Fulgurbloom, and a corpse with Ghost Glovewort [8].
![Ghost Glovewort [8]](https://files.bo3.gg/uploads/image/55967/image/webp-d4d58e64033423c93bb4418ecd4ab607.webp)
Reaching the Boss: Jori, Elder Inquisitor
Return to the platform where the giant cannon enemy was and descend to a lower bridge. Proceed forward and collect Bigmouth Amp Ashes from a chest. Look at the wall to find a ladder. Climb it, go through the tunnel, and defeat the enemy at the end.
Jump down to the stairs, turn left, and go to a corpse against the wall to collect Ghost Glovewort [4]. Return to the stairs, descend, and step on the lift. After descending, proceed forward to the entrance of Jori, Elder Inquisitor, the boss of Darklight Catacombs.

Defeating Jori, Elder Inquisitor
During the fight with Jori, Elder Inquisitor, it's crucial to avoid his magic projectiles by rolling forward to close the distance if you're a melee character. Use items that protect against holy damage, such as Lord’s Divine Fortification, Pearldrake Talisman +3, Haligdrake Talisman +3, and armor with high holy damage resistance.
When Jori's health drops to half or lower, he will summon phantom allies. Avoid their attacks and focus on Jori. If the phantoms hinder your attacks, disable auto-targeting to avoid switching focus to the summoned enemies.
Use a melee spirit ash to distract both Jori and his summoned allies, giving you more attack opportunities. If possible, inflict Scarlet Rot on the boss to deal periodic damage, especially when he teleports, as closing the distance can be challenging.

For defeating the boss, you'll receive the Barbed Staff-Spear and 260,000 runes. For a complete walkthrough and tips to defeat Jori, Elder Inquisitor, check our guide.


Comments