

Explore Wide Range of
Esports Markets
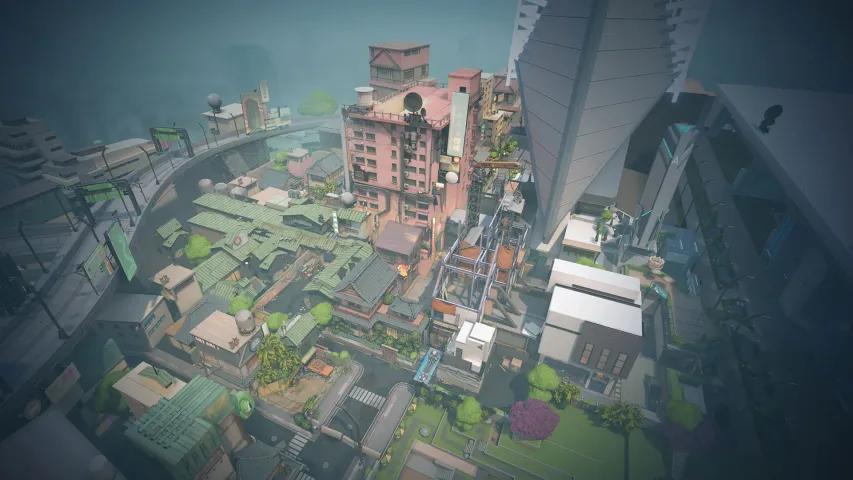
We continue to tell our readers about all the maps in Valorant, sharing the best positions for both the attacking and defending sides during gameplay. Now, it's time to discuss the Split map, the third and last location added to Valorant during the beta test. The map is quite standard, with two Spike installation points, and is designed with Tokyo's capital in mind. Today, the Bo3 editorial team has prepared material for you where we will tell about the best places on the Split map when playing on the defence side.
1

The first spot on point A is on an elevation that allows you to control one of the entries to the plant. Although there are several other places on this platform where it's convenient to encounter the enemy, this position is considered the best. From here, you can always hide from the line of fire or rotate. However, if you hide in the corner on the right, you can easily be cut off from your team, and if you're not playing as Jett or Omen, you almost have no chance of getting out. Another advantage of this spot is that you can also fight enemies who come from the midside using the box on the left, which will serve as cover. Remember, you can't jump over the box, so consider this feature when encountering the enemy.
2

The second crucial spot is on the same platform, but it allows you to control three passages at once. From this position, you can monitor the passages from mid and point A, and also keep an eye on the previous position, in case the enemies plan to enter from there. A big downside of this position is that it's almost entirely open to enemies, and if you are monitoring the A entry, there is a high likelihood of being killed by opponents who unexpectedly come from mid. Choosing weapons for this position is also quite challenging, so we recommend choosing a versatile one, like the Vandal or Phantom.
3

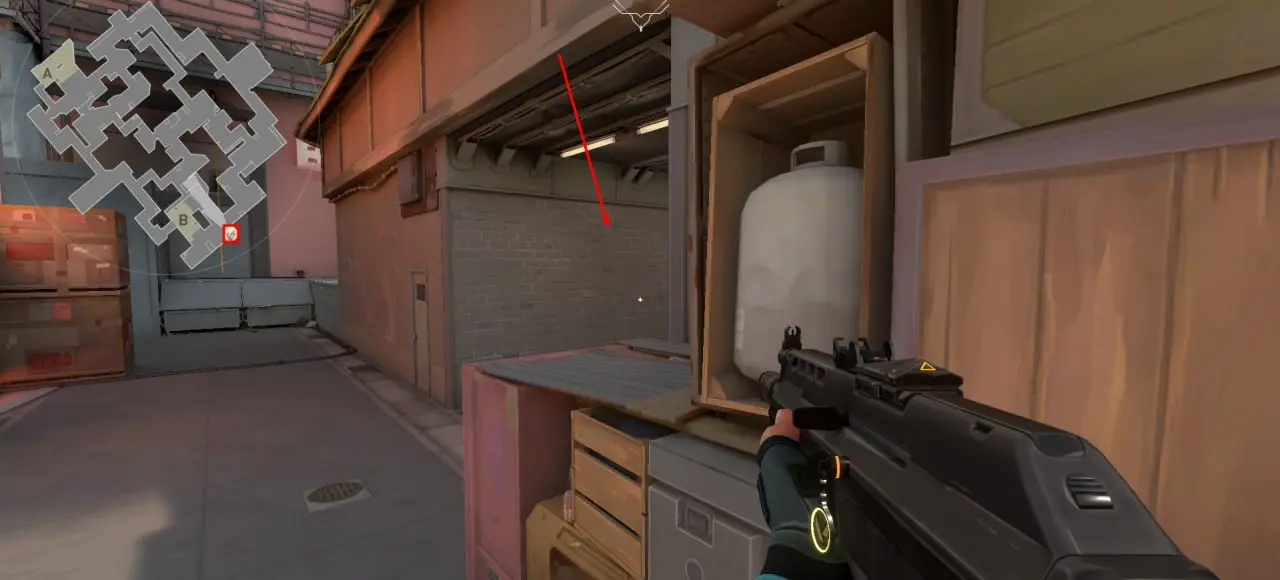
The next position is almost entirely closed off, and it's worth using when enemies have pushed your team out of more open and aggressive spots. Being on this spot, you can control the main passage and partially the window in the central part. A feature of this position is that it opens up many opportunities for manoeuvres. You can hide behind the pedestal with holograms, move as far left as possible, or just rotate through your team's spawn point to plant B.
4

This spot can be considered the safest on point A. It is located near the exit from the spawn point and allows you to fully control the entry to the plant. It is especially convenient to do this with sniper rifles, such as the Operator or Outlaw. However, don't forget that this leaves your back open, and thus enemies from point B, or the central part of the map can easily flank you. For comfortable play in this position, you need teammates who will provide the necessary information and cover your back.
5

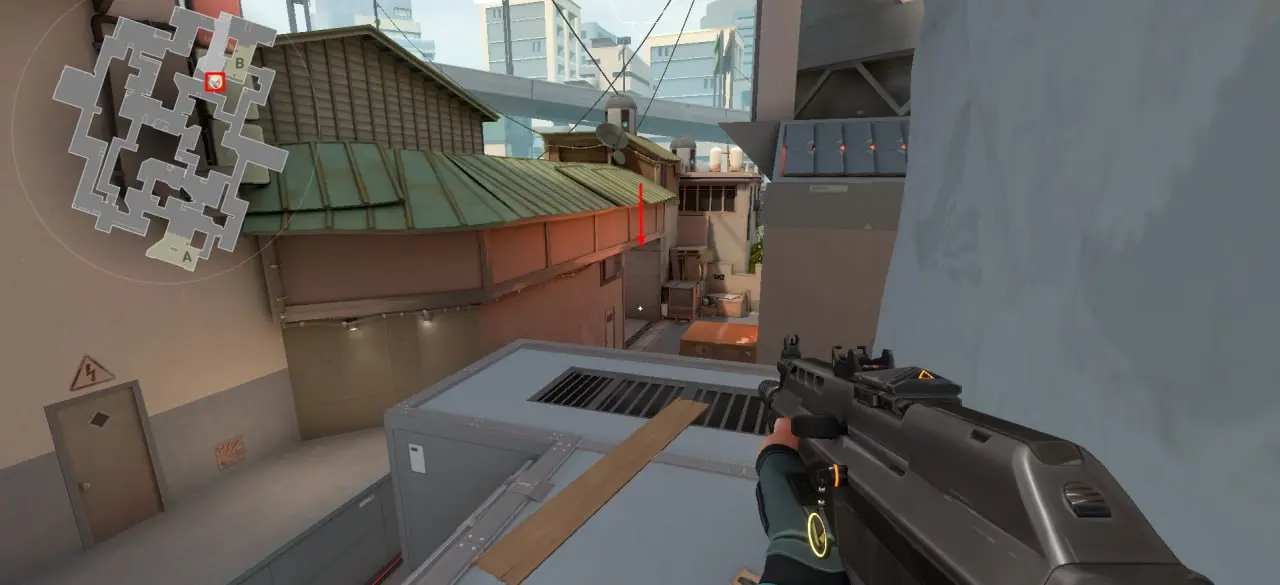
The last spot is located in the central part of the map, and its peculiarity is that from it you can control only one passage. Being in this position, you can hear enemies advancing from the central part, and consequently provide necessary information or just stop the opponents. Note that you don't necessarily have to stand right in this position, you can move forward to the boxes, climb higher in the passage itself, or climb higher behind you. Shotguns are excellent for playing in this position, as they can effectively stop an enemy attack at close range.
1
The first spot on point B is quite well-known, but this does not reduce its effectiveness. Several boxes at the entry to the platform allow you to be one of the first to meet the enemies, but there are a few nuances. Players usually use the larger pink box, but it has several downsides. Firstly, if you are in the wrong position, you will be visible to the enemies, and besides, a small part of the wall that covers you from enemies is penetrable. Therefore, the spot can be considered quite dangerous. We recommend using another box, which although a bit further, is more protected from enemies. Additionally, if you play as Omen or Jett, you can take a position on the highest box, which will surprise the enemies.
2

The next position will also not be a revelation for experienced players. This spot is very similar to point 4 on plant A because you can also control the entry with sniper rifles. The main difference lies in the size of the open area you need to pass to leave the position. If at point A the doors you need to overcome are quite narrow, at this position the passage is almost twice as wide. This means it will be much harder for you to escape and rotate, and correspondingly easier for enemies to cut you off from your team.
3
A partially closed position, allows you to control the entry to the plant, but it has a few downsides. First of all, there is a large distance from the enemies, which does not allow you to effectively use pistols and shotguns. Furthermore, your back remains open, where enemies from mid can enter. However, the downsides of this position are compensated by its considerable size, using which, you can move to the right, and take a more unexpected spot.
4

A rather unusual position, which is located right next to the previous one. This spot cannot be called very popular, but this is precisely what constitutes the secret of its effectiveness. Usually, when enemies enter point B, they check the elevation, as well as some of the previous spots in our list. Thus, few expect an enemy to occupy such an unusual position. Although this spot has its downsides, the main one being that your angle of view is minimal, so if you don't kill an enemy with one shot, you will be immediately noticed, and the effectiveness of the position will drop significantly.
5

The last spot on point B is located right after the exit from the spawn area. A closed position, although it does not allow you to directly control the entry to the plant, gives you the opportunity to meet enemies who have already entered the point. Besides, from this spot, you can control the passage from the central part of the map, and in case of danger, rotate to point A.

After reading our material, you've learned about the best spots on the Split map that can be occupied by the defence side. Continue following our portal to learn about the best spots for the attack side, as well as the best spots on all ten maps in Valorant.


Comments