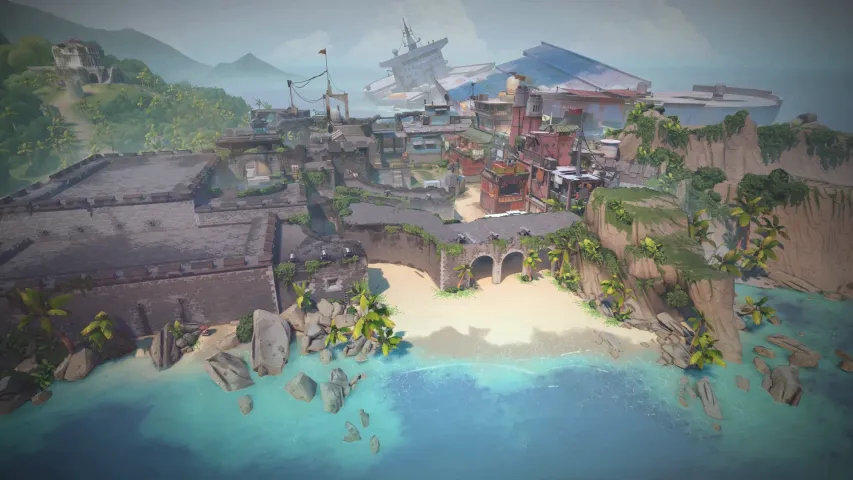
We continue to tell you about the best places on all maps in Valorant, for both defense and attack sides. Today, we move on to the sixth map in order, Breeze, which was added to the game along with update 2.08 released on April 27, 2021. Breeze is based on the globally famous mysterious location, the Bermuda Triangle, located in the Atlantic Ocean and known as a site where numerous ships have sunk. The map itself has two Spike planting sites, but despite this, it is considered more challenging for the defense side than for the attackers. The reason is the considerable distance between points A and B, which requires more time for effective rotation. However, with the right positioning, the defense side can feel quite comfortable on Breeze. Therefore, today, the Bo3 editorial team has prepared material for you where we will talk about the best spots on the Breeze map for playing on the defense side.
Point A
1

The first spot at point A is an example of a classic closed position, where you can be among the first to encounter players. This spot is not particularly new and was used in the past when plant A was in its first variation and is used now after significant reworks of the Breeze map. From this position, you can control only one direction, but you will also be protected from enemies trying to pass from mid. If you play as agents like Jett or Omen, you can rise to the boxes on the left, but then your back will be fully exposed. Sniper rifles are not well-suited for this position; it is better to prefer shotguns or weapons that perform well at medium and close ranges.
2

The second spot is located close to the first, but unlike it, it is more protected and allows effective use of sniper rifles. From this position, you can control not only the left passage to the point but in case the enemies advance from mid, you can also turn around and safely damage them using the columns for protection. The main feature of this position is the distance to the enemies, from whichever direction the opponents may come, you will always be quite far from them. This means that this spot is suitable for using one of the three available sniper rifles if you are skilled with them.
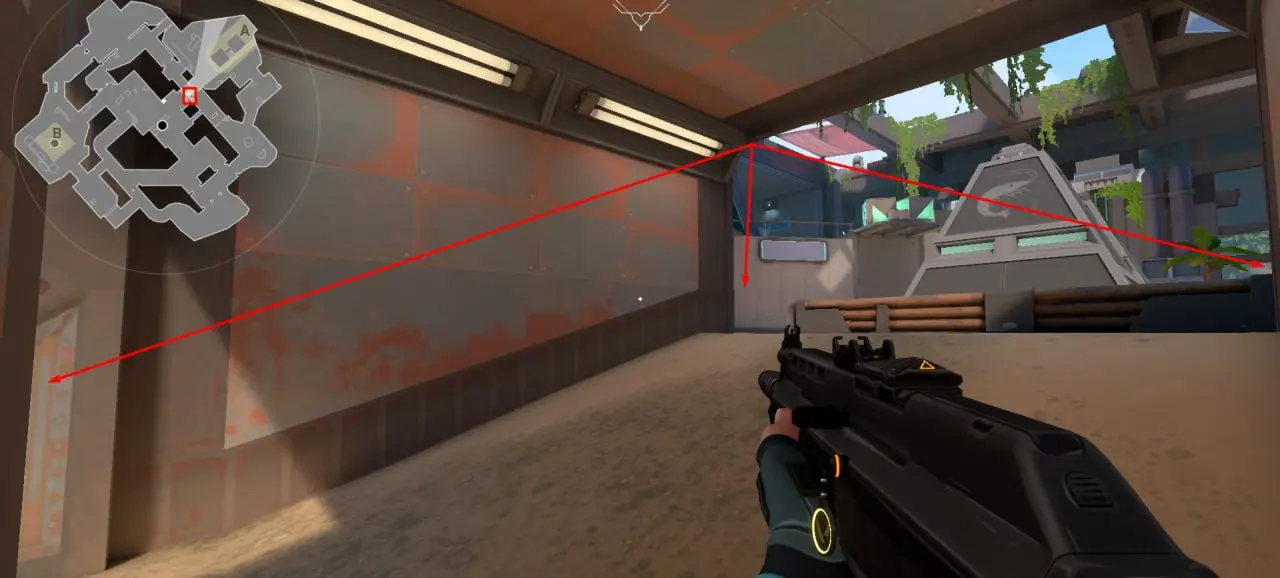
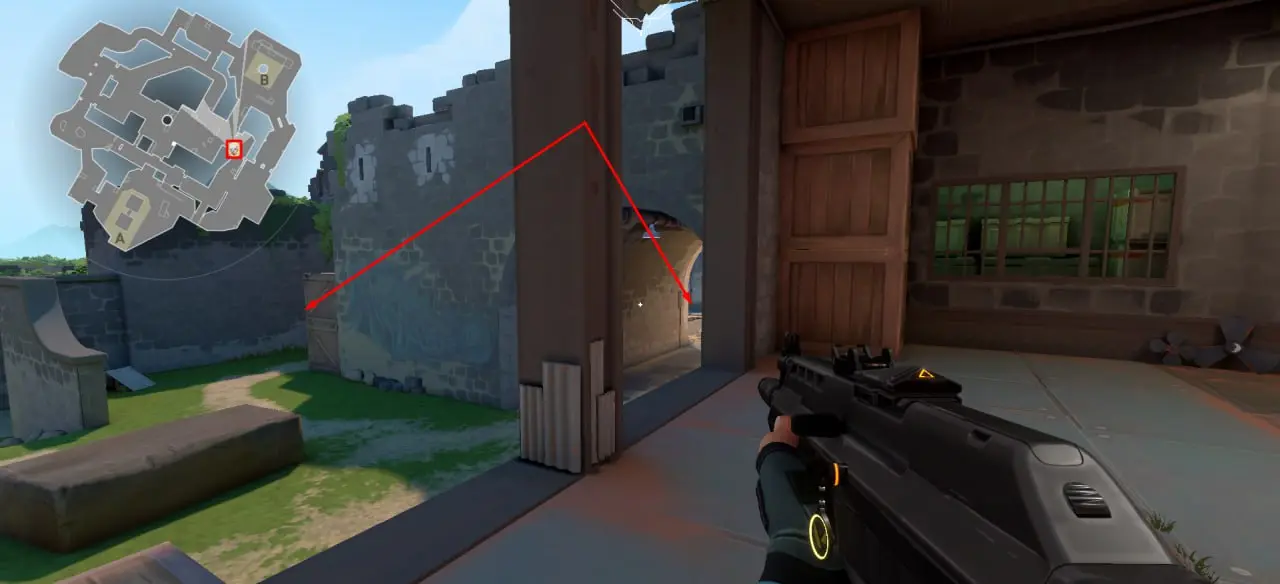
3

The next position is also of a closed type but is closer towards the central part of the map. From this spot, you can not only control the two entries to point A but also partially monitor the central passage directly connected to the attacking side. A unique feature of this spot is the various doors. The door on the left can be opened and closed using an automatic control on the wall. Unlike the bomb door on other maps in Valorant, these doors cannot be destroyed, so they will be a lifesaver in case the majority of enemies are attacking, and you need to rotate and retreat to your allies. Also, behind this point is another set of doors; although they do not close, they can be used as protection from the enemy. It's essential not to forget that they are penetrable.
4
This position is similar to the first on our list because from here, you can safely monitor only one of the passages. It is typically used to control the central part of the map and to hold back enemies entering point A. However, in some cases, you can move here when opponents have already started entering plant A. From this position, you will partially see the Spike planting area and can retreat to mid in cases where enemies have discovered your location. Overall, the spot is quite specific, so we recommend considering it before taking it immediately.
5

The last spot at point A is located almost at the spawn of the defense side, and it can only be effectively used under certain conditions. The thing is that from this position, the distance to the enemies is very long, and if you are not armed with a sniper rifle, it will be quite problematic to kill an enemy. Typically, this position is used in cases where the opponents have already taken the plant, and there is no possibility to recapture it. In such cases, the defense players will save their weapons but will try to make a few more kills, which is quite convenient from this position because you will always have a chance to escape. Additionally, you can rise to the upper platform marked with a blue arrow to be even more protected.
Point B
1

Point B, unlike A, has fewer shelters, making it hard to effectively encounter enemies on it. The first spot is located right at the entrance to the plant, in the upper right corner. From this position, you can only control one main entry to the plant, so it is important that your teammates keep the passage from the central part under control. Despite the fact that the position is close to the enemies, the actual distance to them will not be close. This means that shotguns at this point will be quite ineffective. Also, this position can be considered quite protected, and in any case, you can move back or, using the boxes, rise to a higher level where the Spike planting platform is located.
2

The second spot is located near the first, but from it, you can control both entries to the plant and the entire platform. This position is usually occupied by team snipers because the distance to the enemies is very large. If you are proficient with the Operator or other snipers, you will be the one who lays down the main number of enemies and defends plant B. But do not forget that the enemies may also have players armed with sniper rifles, and with good team coordination, they can easily distract you, and the enemy sniper will ultimately kill you.
3

The next position on point B is similar to the fourth point on plant A. From this spot, you can monitor both entries to the plant, but you will only be able to effectively hold one of them. The fact is that if you plan to watch the passage from mid, then your side will be unprotected, and enemies from their direction will easily kill you. A similar situation will occur if you want to move closer and monitor the entry from the attacking side; again, your side will open, and enemies from mid will kill you. The best solution while being in this position would be to move back so that both directions are in your field of view. But in such a case, the distance to the enemies from the direction of B will be very large, and you will not be able to effectively kill them with one or two shots unless armed with sniper rifles.
4

The position from which you can safely control the entire plant B is located right at the spawn point of the defense team. From this spot, you have a view of the passage from mid and almost the entire location except for the main passage from the attacking side. But the very number of passages is the main danger when playing at this position. If you no longer have teammates who are also monitoring the plant, then holding the location and stopping the enemies on your own will not be possible. This spot can also be used when saving weapons at the end of the round because from it, you can safely retreat and hide at plant A.
5
The last spot on our list is quite specific and is not entirely related to point B. The position is located in the central part of the map, where you can exit directly from the spawn direction of the defense side. It is usually used to control mid, but from it, you can also exit directly to point B, so it can partially be used for its defense as well. From this spot, you can give your allies a lot of information about the movement of the enemies. Also, in some cases, you can try to flank the opponents to attack them from behind. But note that controlling plant B from this position is very difficult, and safely entering it requires time, which may sometimes be insufficient. Therefore, the position is quite situational, and you will not always be able to use it effectively.

Conclusion
After reading our material, you learned about the best positions on the Breeze map when playing for the defense side. Continue following our portal to learn about the best spots for the attacking side, as well as about other maps in Valorant, including the new Abyss, which will appear in the game soon.


No comments yet! Be the first one to react