Every CS2 player wants smooth performance, fast input reactions, and stable FPS. Config files (CFGs) help you control your game settings with precision. They let you save keybinds, graphics tweaks, crosshair settings, and performance commands so your game works exactly the same every time you launch it. This updated 2025 guide explains how to create, edit, and run CFG files in the newest version of Counter-Strike 2.
What Is a CS2 Config?
A CS2 config is a small text file that contains console commands. CS2 reads this file and applies your settings – such as keybinds, rates, viewmodel options, and FPS commands – automatically. If you want to keep your setup consistent and avoid resetting settings after updates, configs are the best solution.
Configs are also used in guides about CS2 cfg settings, performance optimization, and competitive setups used by pro players.
How to Create and Edit a CS2 Config

1. Find the CS2 CFG Folder
The path changed slightly after updates. The correct path in 2025 is:
SteamLibrary\steamapps\common\Counter-Strike Global Offensive\game\csgo\cfg
(Yes, CS2 still uses the "csgo" folder – this is normal.)
2. Create Your Config
- Right-click → New → Text Document
- Name it something like: myconfig.cfg
- Make sure it ends with .cfg and not .txt.
3. Add Commands
Open the file with Notepad and add your commands, for example:
bind "F" "+use"
cl_ragdoll_physics_enable 0
fps_max 400
Save the file.

4. Make Sure File Extensions Are Enabled
In Windows Explorer → View → check File Name Extensions. This prevents the file from accidentally saving as myconfig.cfg.txt.
Autoexec.cfg in CS2
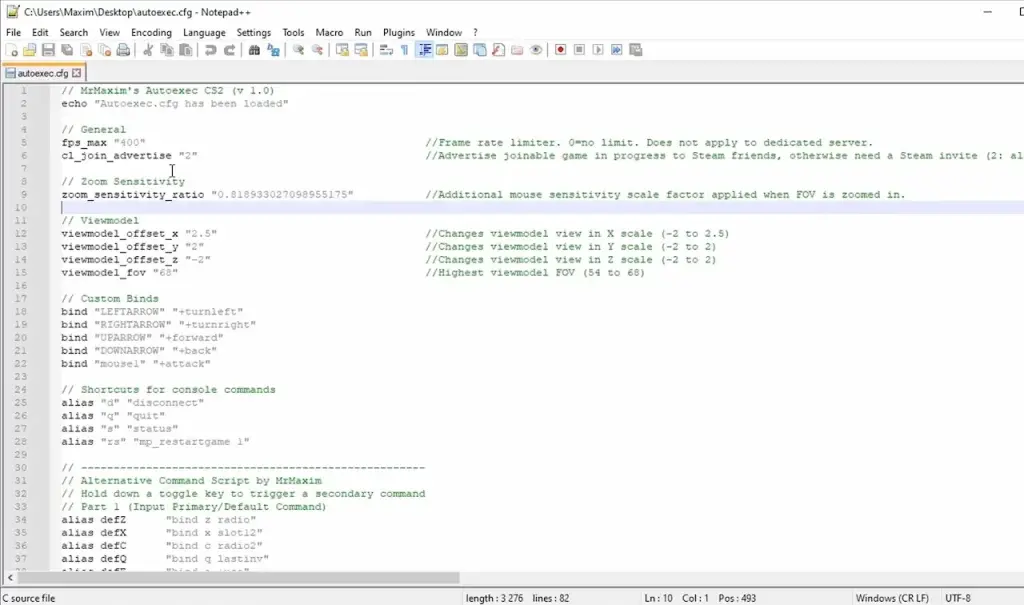
autoexec.cfg is a special config that runs each time CS2 starts. This is ideal for commands you always want enabled, like performance tweaks or viewmodel settings.
How to Create autoexec.cfg
Same method as above. Just name it:
autoexec.cfg

How to Run It Automatically
- Open Steam → Library
- Right-click CS2 → Properties
- In Launch Options add:
+exec autoexec.cfg
This ensures your commands load on every launch – no need to run anything manually.
How to Execute Config Files in CS2
You can run any config manually or automatically. This section covers how to exec cfg in CS2 so players can quickly load their settings.
Manual (Using the Console)
- Start CS2
- Open the console with ~
- Type:
exec myconfig.cfg

Automatic (On Game Launch)
Use Steam Launch Options and add:
+exec myconfig.cfg
This explains how to load cfg in CS2 if you want it to apply automatically.
How to Use CFG in CS2
Many players wonder how to use cfg in CS2 after creating one. The answer is simple: put your .cfg file into the cfg folder, then run it using either the console or Steam launch options. From that moment, your CS2 setup loads instantly, improving consistency in every match. Here is the short video with the step by step visualization:
How to Transfer Your CS:GO Config to CS2
If you had a CS:GO config:

1. Find It
Steam\userdata\YOURSTEAMID\730\local\cfg
2. Copy Files
Copy files like:
- autoexec.cfg
- config.cfg
- Any custom config names.
3. Paste Into CS2's CFG Folder
Paste them here:
SteamLibrary\steamapps\common\Counter-Strike Global Offensive\game\csgo\cfg

Important Note
Some old CS:GO commands were removed in CS2. If something doesn’t work, remove outdated commands and update them using new ones from the official CS2 console command list.
If you want to learn how to put cfg in CS2, this guide explains the full process step by step. With the updated instructions for 2025, you can create, edit, and run your CFG files quickly and confidently.


No comments yet! Be the first one to react